
How to Create Widget in Magento 2
Widget Magento 2 and Its Function
Widget is an important element of a Graphical User Interface (GUI) that provides a specific way for an end user to interact with any software application or operating system. It allows admins to add dynamic or static content to CMS pages and blocks in Magento 2 site. You can take a benefit of thewidget Magento 2to improve your storefront under the live interface as an eCommerce store owner. Widgets are similar to static blocks and they allow inserting all types of content into static pages or a static block. Below listed are few widgets that are available in Magento 2 by default:
- CMS Page Link
- CMS Static Block
- Catalog Category Link
- Catalog New Products List
- Catalog Product Link
- Catalog Products List
- Orders and Returns
- Recently Compared Products
- Recently Viewed Products
How to Create Widget in Magento 2?
Learn how to create a widget in Magento 2 by following the steps mentioned here. Please follow the below 4 simple steps for creating Magento 2 widget:
-
Step 1: Initialize and Declare Widget
Create a file filename/widget.xml with the following content or you can use file name such as VendorName/Module/etc/widget.xml.
                <?xml version="1.0" ?>
                 <widgets xmlns:xsi="http://www.w3.org/2001/XMLSchema-instance" xsi:noNamespaceSchemaLocation="urn:magento:helloworld:Magento_Widget:etc/widget.xsd">
                    <widget class="Mageants\CustomWidget\Block\Widget\Posts" id="mageants_customwidget_posts">
                       <label>Blog Posts</label>
                      <description>Posts</description>
                       <parameters>
                         <parameter name="posts" sort_order="10" visible="true" xsi:type="text">
                            <label>Custom Posts Label</label>
                        </parameter>
                       </parameters>
                   </widget>
                </widgets>
You can the below use configuration options.
- Set 1:
- Option: Label
- Description: The name of the widget
- Type: String
- Required: Yes
- Set 2:
- Option: Description
- Description: It contains a concise explanation of the widget’s purpose
- Type: String
- Required: Yes
- Set 3:
- Option: parameters
- Description: A list of widget’s options
- Type: Object
- Required: No
- Set 4:
- Option: Containers
- Description: A list of layout containers, where the widget may be injected
- Type: Object
- Required: No
- You can add Magento 2 widget parameters. As a parameter, you can use any of these field types:
- text
- select
- multiselect
- block
After setting parameters, you also need to add a dependency to Magento_Widget in the module.xml file, as shown below:
etc/module.xml
<sequence> <module name="Magento_Widget" /> </sequence> -
Step 2: Create a Widget Template File
In this step, you need to create a file with the path view/frontend/templates/widget/posts.phtml and add below code to it.
<?php if($block->getData('posts')): ?> <h2 class='posts'><?php echo $block->getData('posts'); ?></h2> <p class="text-base text-clr mb-4">This is sample widget. Perform your code here.</p> <?php endif; ?> -
Step 3: Create Widget Block Class
Create block file: Block/Widget/Posts.php
<?php namespace Mageants\CustomWidget\Block\Widget; use Magento\Framework\View\Element\Template; use Magento\Widget\Block\BlockInterface; class Posts extends Template implements BlockInterface { protected $_template = "widget/posts.phtml"; } -
Step 4: Clean Cache and Posts
In this step, you should flush the Magento cache and run a post. To run a post, follow the below process.
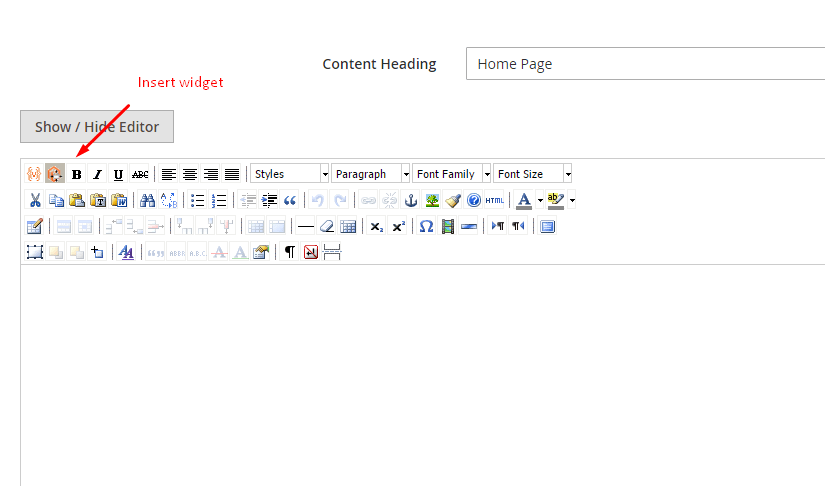
- Go to Admin Panel > Content > Pages > Home Page > Edit
- In the content tab, click on insert widget icon as below
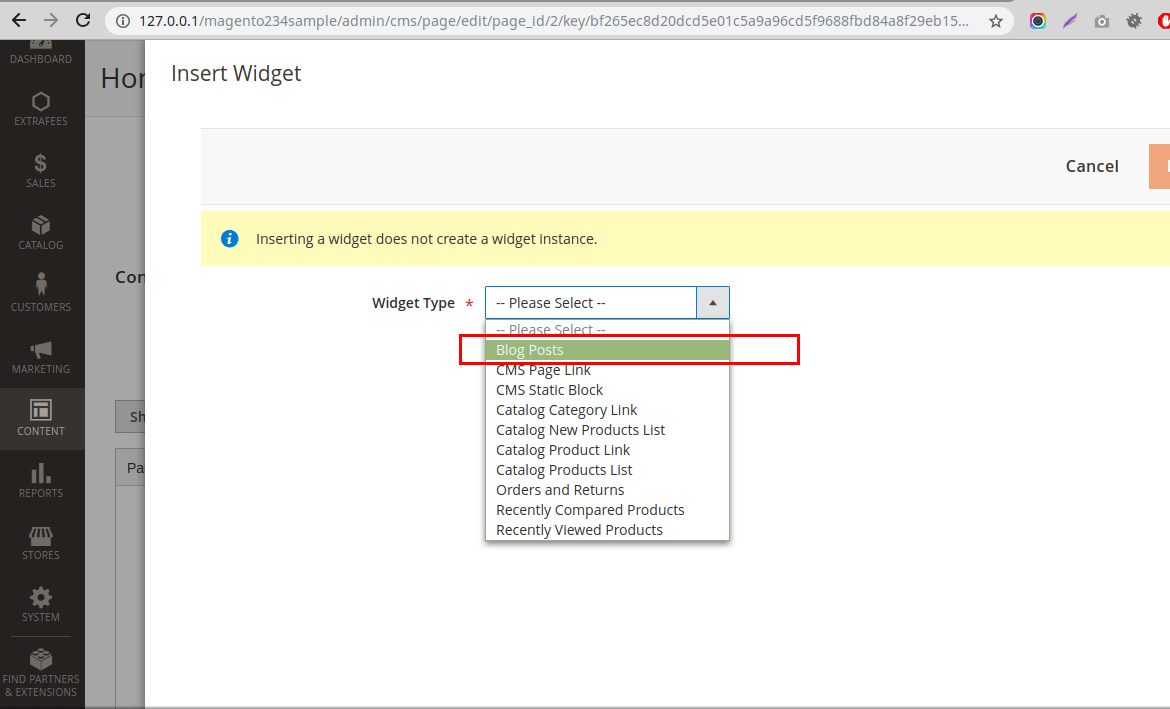
You will get the Blog Posts in widget list as shown below:
Following widgets are available in Magento 2:
- Accordion widget
- Alert widget
- Breadcrumbs widget
- Calendar widget
- Collapsible widget
- Confirmation widget
- Dropdown widget
- DropdownDialog widget
- FolderTree widget
- Gallery widget
- List widget
- Loader widget
- Magnifier widget
- MediaUploader widget
- Menu widget
- Modal widget
- Multiselect widget
- Navigation widget
- PasswordStrengthIndicator widget
- PopupWindow widget
- Prompt widget
- QuickSearch widget
- RedirectUrl widget
- RemainingCharacters widget
- RowBuilder widget
- Sortable widget
- Sticky widget
- Tabs widget
- ToggleAdvanced widget
- TrimInput widget
Let’s talk about Magento 2 Calendar Widget.
Magento 2 calendar widget is a customized jQuery Datepicker widget that helps to choose a data using a pop-up or an in-line calendar. You can add it in any custom form text filed using simple code.
The jQuery Datepicker widget source is lib/web/mage/calendar.js.
-
Step 1: Initialize and Declare Widget
How to initialize the Magento 2 Calendar Widget?
You need to initialize a widget in a JS component or .phtml template.
How to configure the Magento 2 Calendar Widget?
In Magento 2, calendar widget’s global configuration is set to default options, automatically applied when each calendar instance is initialized and it includes the following features:
- Translation for months, days and control buttons
- Time and Date format
- Setting of Animation
- Calendar pop-up modes
- Server time zone offset
Following example shows how to set global widget configuration in Magento 2:
            require([
               'jquery',
               'mage/calendar'
               ], function ( $ ) {
                 $.extend(true, $, {
                   calendarConfig: { ... }
                 });
           });
If you want to use custom parameters, refer the below code:
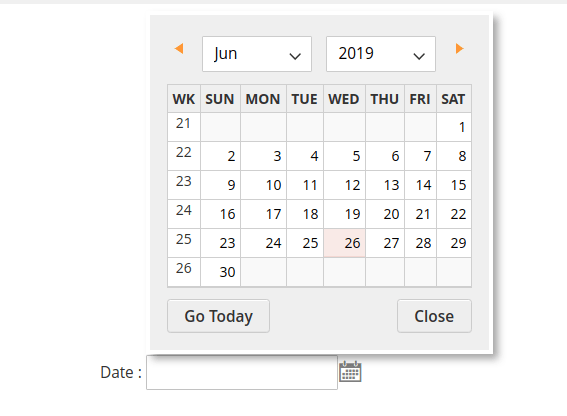
          <div class="field">
               <label>Date : </label>
                <input type="text" class="input-text" id="example-date" name="example-date" />
          </div>
          <script>
              require([
                 'jquery',
                 'mage/translate',
                 'mage/calendar'
                 ], function ($, $t) {
                   $('#example-date').calendar({
                     changeMonth: true,
                      changeYear: true,
                     showButtonPanel: true,
                      currentText: $t('Go Today'),
                      closeText: $t('Close'),
                     showWeek: true
                    });
               })
          </script>
So, execution of above code will give you the below output:
The result will be a calendar and an icon (Click Here) that opens the calendar.
Initial output:

Output for the opened state:
And that’s all about it. Hope this will help you to know how to create a widget in Magento 2. You can start empowering your website with added functionality. Please share your comment in case if you have any doubts or need any help on this and bookmark it for your future reference.
