
How to Create Customer Address Custom Attribute in Magento 2
In Magento 2 sometimes we need to add additional information in customer address In this case, we can create a custom address field to store the additional information. So, in this blog, we will learn how to create a custom customer address attribute then set the value of this attribute and get the value of this attribute.
Magento 2 create/add customer address custom attribute
To Create or add a customer address attribute we need to create a PHP file for defining our customer address attribute name and attribute_code.To Create custom customer address attribute follow below steps:
Step 1:
Firstly, we will create the InstallData.php file at below path : Mageants -> Blog -> Setup -> InstallData.php
|
<?phpnamespace Mageants\Blog\Setup; use Magento\Eav\Model\Config;use Magento\Eav\Setup\EavSetup;use Magento\Eav\Setup\EavSetupFactory;use Magento\Framework\Setup\InstallDataInterface;use Magento\Framework\Setup\ModuleContextInterface;use Magento\Framework\Setup\ModuleDataSetupInterface; class InstallData implements InstallDataInterface {private $eavSetupFactory;public function __construct(EavSetupFactory $eavSetupFactory,Config $eavConfig) {$this->eavSetupFactory = $eavSetupFactory;$this->eavConfig = $eavConfig;} public function install(ModuleDataSetupInterface $setup, ModuleContextInterface $context) {$eavSetup = $this->eavSetupFactory->create(['setup' => $setup]); //creating a custom text field programmatically $eavSetup->addAttribute('customer_address', 'custom_address_attribute', ['label' => 'Custom Address Attribute','system' => 0,'position' => 700,'sort_order' => 700,'visible' => true,'note' => '','type' => 'varchar','input' => 'text',]); $this->getEavConfig()->getAttribute('customer_address', 'custom_address_attribute')->setData('is_user_defined', 1)->setData('is_required', 0)->setData('default_value', '')->setData('used_in_forms', ['adminhtml_customer_address', 'customer_address_edit', 'customer_register_address'])->save();} public function getEavConfig() {return $this->eavConfig;}} |
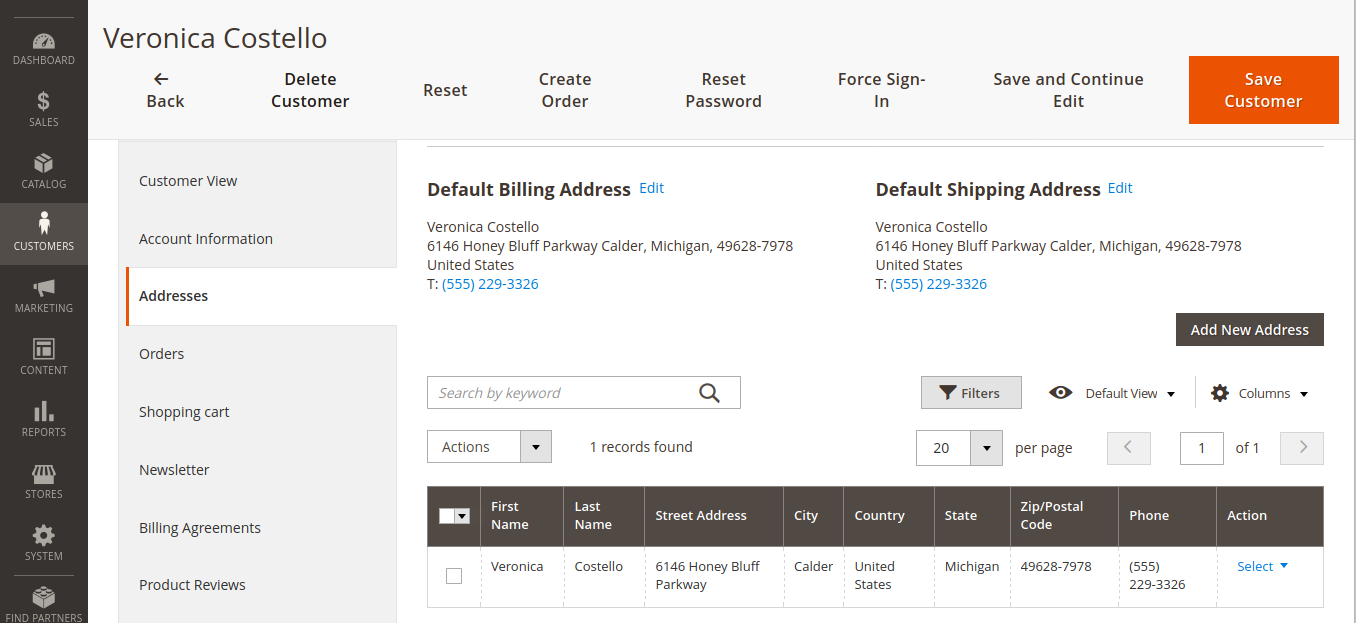
After Creating InstallData.php You have to run php magento setup:upgrade and php bin/magento setup:static-content:deploy then check the result at Customer -> All Customer -> Click on Edit Customer Link->Addresses -> Click on Select and Edit Customer Link.
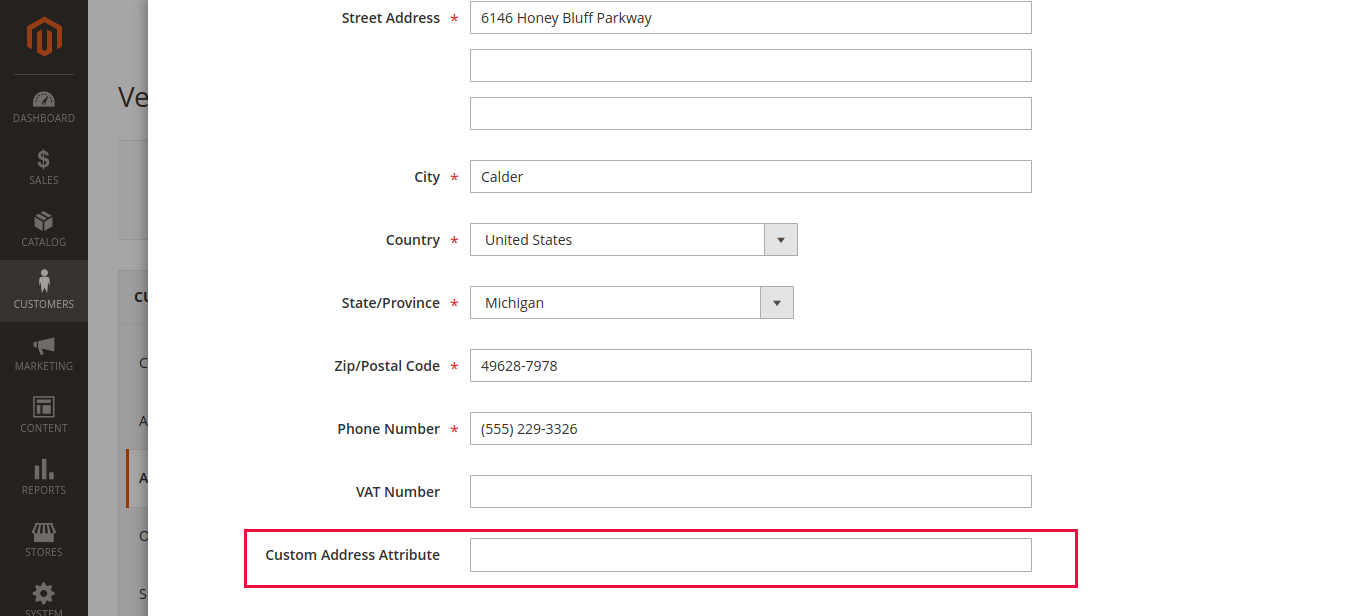
In the above code our attribute code is “custom_address_attribute” and label is “Custom Address Attribute”.
Magento 2 Set Customer Custom attribute value
To set Custom Customer Address Attribute value we take Magento\Customer\Model\Address instance and created it’s object($address) and used Magento\Customer\Model\ResourceModel\AddressFactory instance and created it’s object($addressFactory).
To Set Custom Customer value, firstly we create Helper File at Mageants->Blog->Helper->Data.php
|
<?phpnamespace Mageants\Blog\Helper; class Data extends \Magento\Framework\App\Helper\AbstractHelper{ protected $address;protected $addressFactory;protected $storeManager;protected $addressRepositoryInterface; protected $pageFactory;public function __construct(\Magento\Customer\Model\Address $address,\Magento\Customer\Model\ResourceModel\AddressFactory $addressFactory,\Magento\Customer\Api\AddressRepositoryInterface $addressRepositoryInterface){$this->addressRepositoryInterface = $addressRepositoryInterface;$this->address = $address;$this->addressFactory = $addressFactory;}public function setCustomAttribute($customerId,$attributevalue){$customerId = "1"; $attributeCode = "custom_address_attribute";$customer = $this->address->load($customerId);$customerData = $customer->getDataModel();$customerData->setCustomAttribute($attributeCode,$attributevalue);$customer->updateData($customerData);$customerResource = $this->addressFactory->create();$customerResource->saveAttribute($customer,$attributeCode);}} |
Now,We Create Controller file at Mageants->Blog->Controller->Index->Index.php
|
<?phpnamespace Mageants\Blog\Controller\Index; class Index extends \Magento\Framework\App\Action\Action{ protected $pageFactory;public function __construct(\Mageants\Blog\Helper\Data $helper,\Magento\Customer\Model\ResourceModel\AddressFactory $addressFactory,\Magento\Framework\App\Action\Context $context,\Magento\Framework\View\Result\PageFactory $pageFactory){$this->helper = $helper;$this->pageFactory = $pageFactory;return parent::__construct($context);}public function execute(){$customerId = "1"; $data = "Hello123";$this->helper->setCustomAttribute($customerId,$data);return $this->pageFactory->create();}} |
Magento 2 get customer custom attribute value
To get Custom Customer Address Attribute value you have to use Magento\Customer\Api\AddressRepositoryInterface instance and created it’s object($addressRepositoryInterface)
To Get Custom Customer value, firstly we create Helper File at Mageants->Blog->Helper->Data.php
|
<?phpnamespace Mageants\Blog\Helper; class Data extends \Magento\Framework\App\Helper\AbstractHelper{ protected $address;protected $addressFactory;protected $storeManager;protected $addressRepositoryInterface; protected $pageFactory;public function __construct(\Magento\Customer\Model\Address $address,\Magento\Customer\Model\ResourceModel\AddressFactory $addressFactory,\Magento\Customer\Api\AddressRepositoryInterface $addressRepositoryInterface){$this->addressRepositoryInterface = $addressRepositoryInterface;$this->address = $address;$this->addressFactory = $addressFactory;} public function getCustomAttribute($customerId){$customerId = "1"; $attributeCode = "custom_address_attribute";$customer =$this->addressRepositoryInterface->getById($customerId);print_r($customer->getCustomAttribute($attributeCode)->getValue());}} |
Now,We Create Controller file at Mageants->Blog->Controller->Index->Index.php
|
<?phpnamespace Mageants\Blog\Controller\Index; class Index extends \Magento\Framework\App\Action\Action{ protected $pageFactory;public function __construct(\Mageants\Blog\Helper\Data $helper,\Magento\Framework\App\Action\Context $context,\Magento\Framework\View\Result\PageFactory $pageFactory){$this->helper = $helper;$this->pageFactory = $pageFactory;return parent::__construct($context);}public function execute(){$customerId = "1"; $this->helper->getCustomAttribute($customerId);return $this->pageFactory->create();}} |
Conclusion :
We hope above blog helps you to clearly understand How to Create Customer Address Attribute in Magento 2 Programmatically. In case of any kind of problem with the above code implementation, you can contact us or let us know in comment section.
