
How to Add Configurable Product in Magento 2
There is an option to create a simple product with many custom options but then, in that case, it won't be possible to track the stock of each variation. But with configurable products, Magento 2 easily monitors which product variation runs out or will be out of stock soon. So one of the main advantages of configurable products is that you can continuously monitor and control the inventory for each product variation independently.
Now let’s find out the simple steps to add configurable products in Magento 2.
You can create a Configurable Product in Magento 2 through the below options:
- Using Backend Panel
- Using CSV file
Using Backend Panel:
So let's go through the process of creating configurable products using backend panel:
Step 1: Choose the type of Product
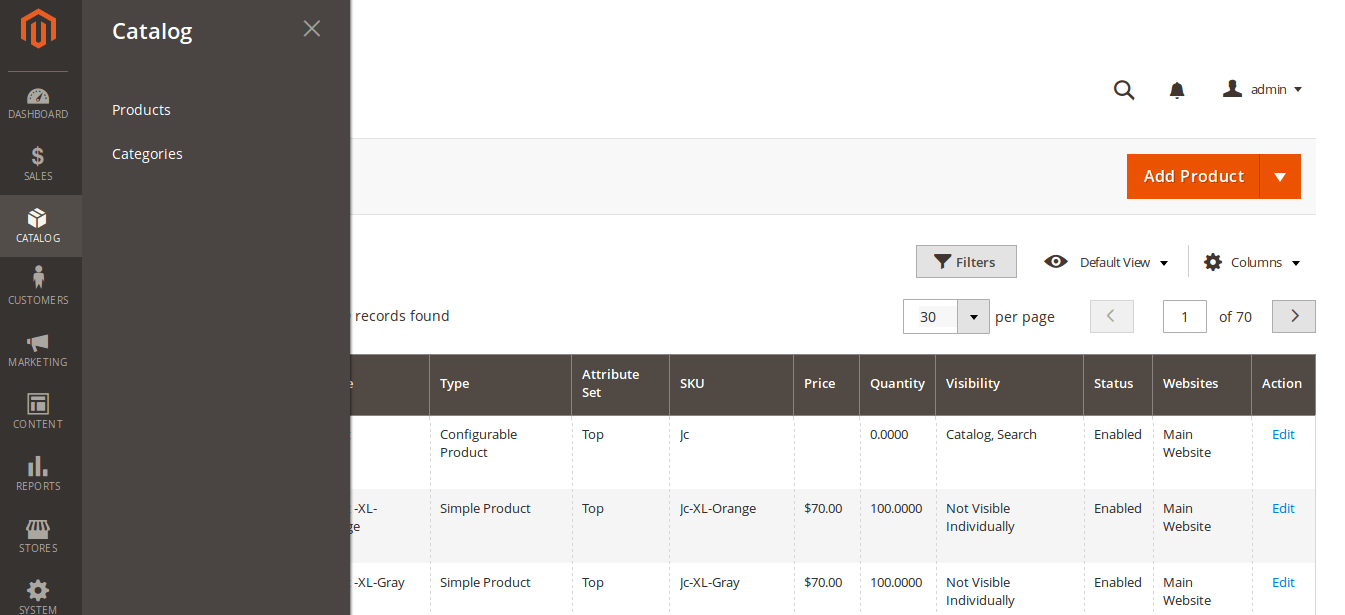
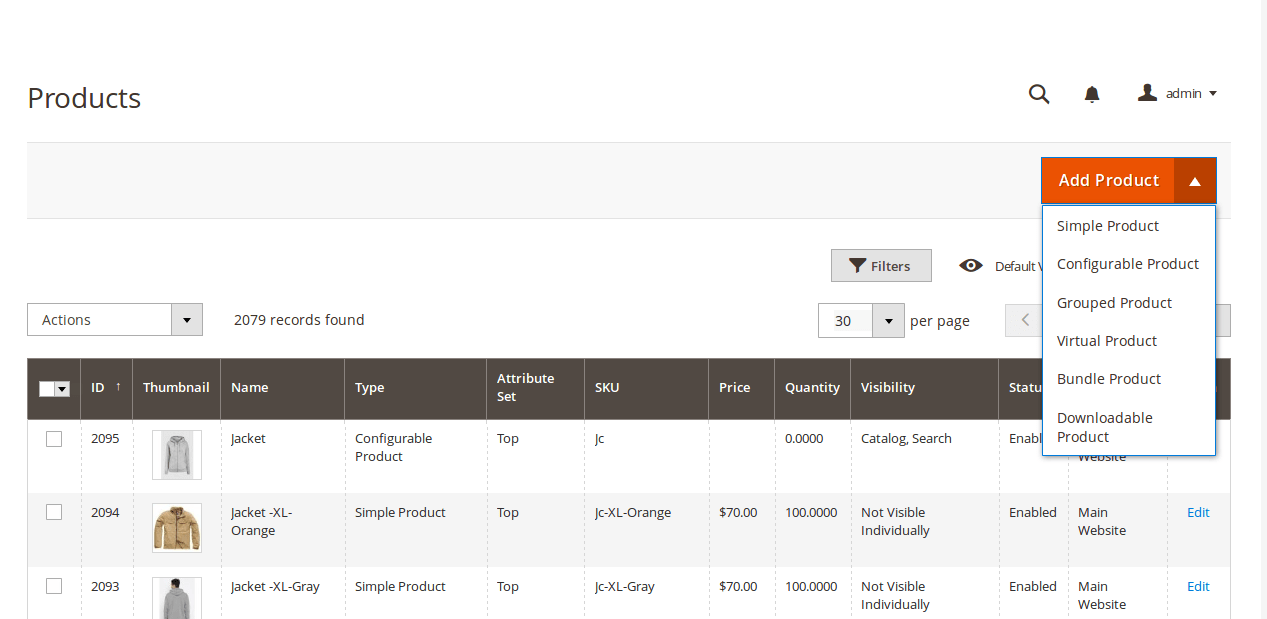
- On the backend sidebar, click products under catalog menu.
- There will be a drop-down menu “Add Product” on the upper right corner, select Configurable Product from the drop-down list.
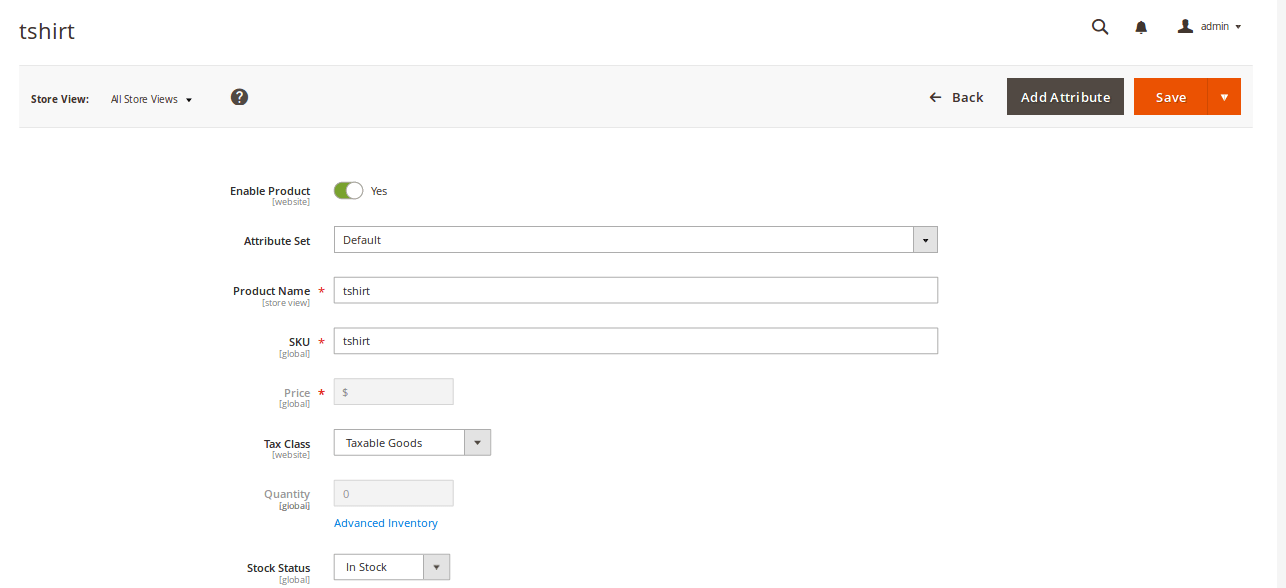
Step 2: Complete the required details about Product
- In product details section, fill in all the required details such as
- Enable Product (YES/NO)
- Enter the Product name
- Enter the price of the product
- Add SKU
- Add Tax Class
- Enter the product description
- Add Image, Weight, Quantity etc.
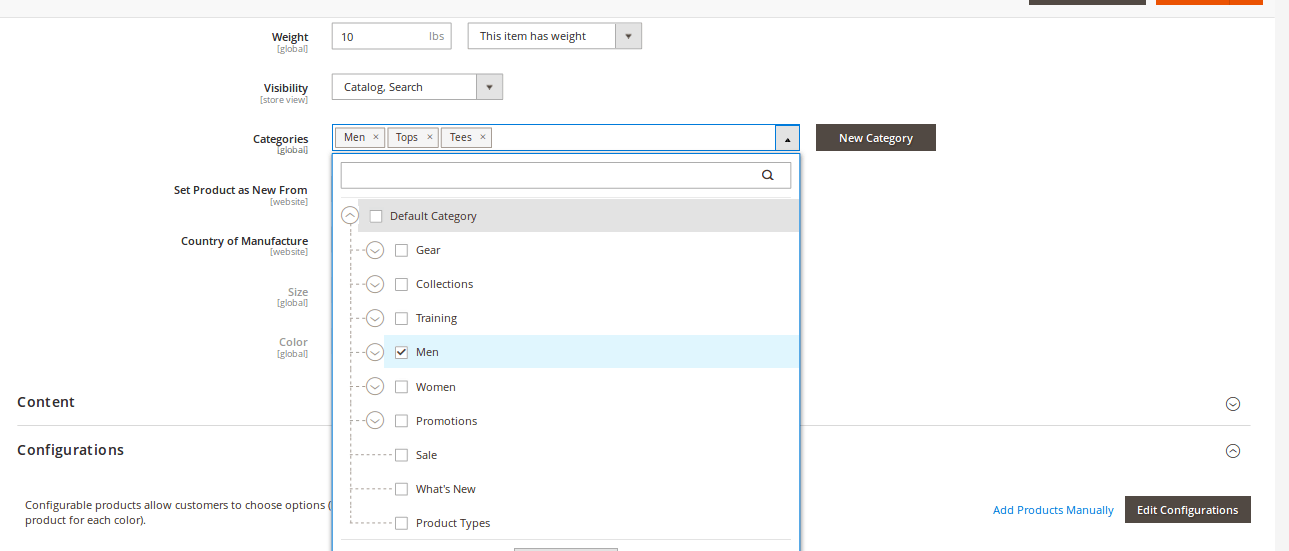
- Assign product to some category. If a category name is available in the list then select one or else you have an option to create a new category.
- Once all the required details are filled, submit the details and continue with Adding Configuration process.
Step 3: Add Configurations
- In the product details section, there will be an option of “Configurations”. Expand that section and click on “Create Configurations”

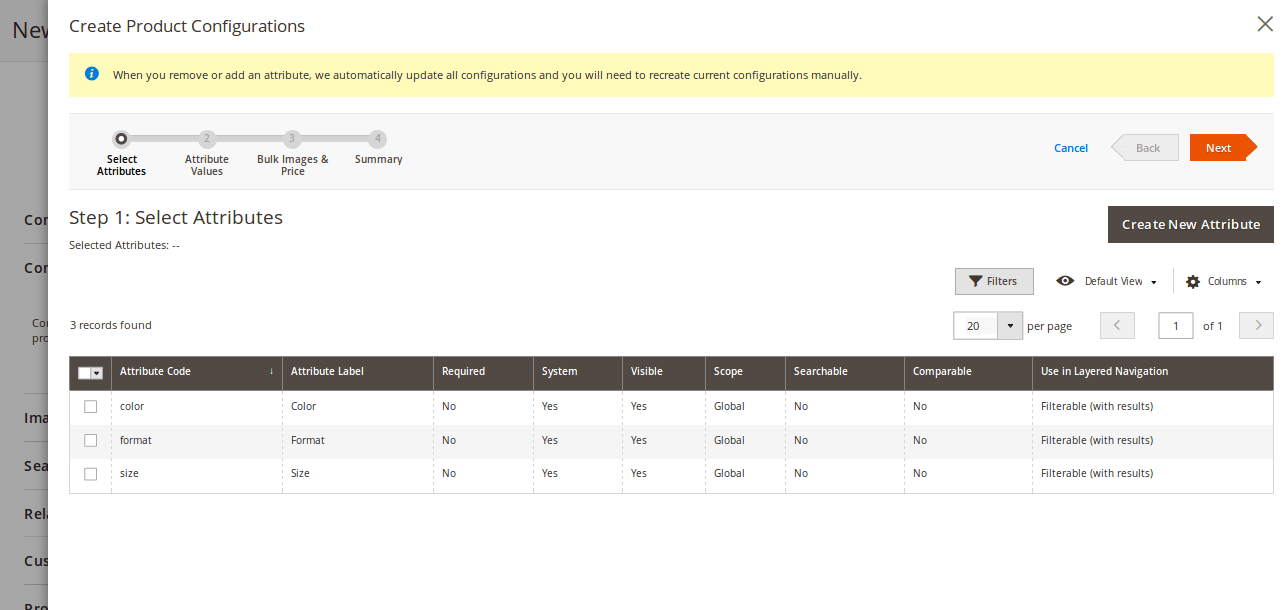
You can track where you are in the process by simply keeping an eye on the progress bar at the top of the page, and find out what the next step will be.
- The first step to create configurations is to select the attributes. So just mark the checkbox of each attribute that you want to set for your product.
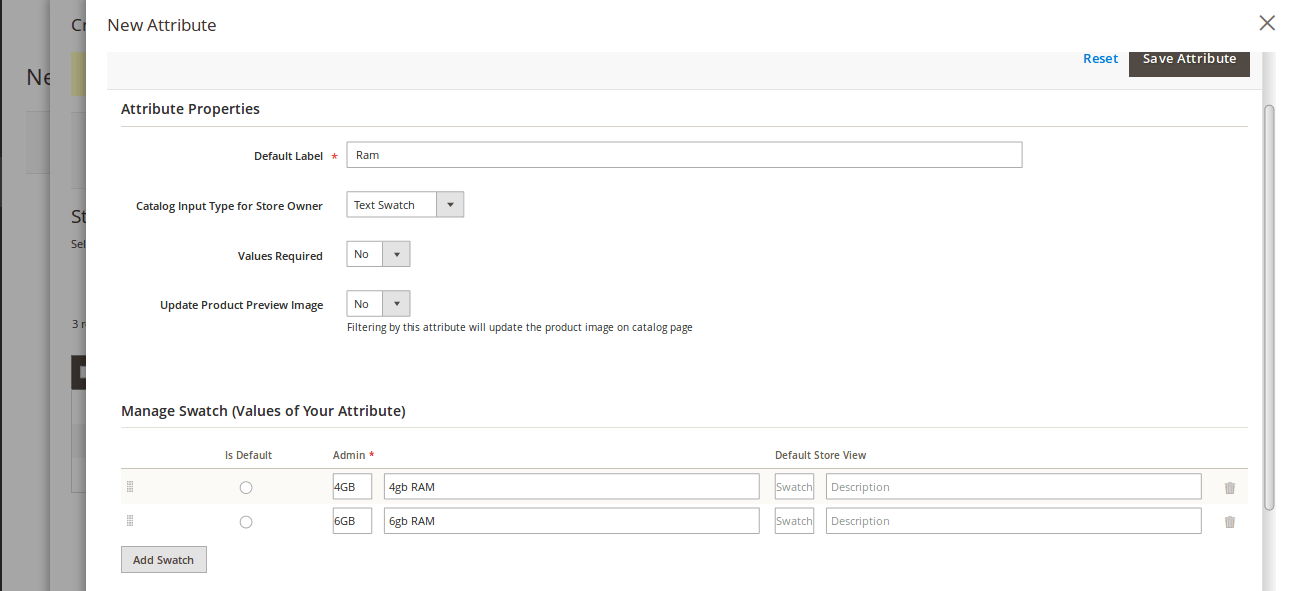
- In case you need to add a new attribute, then click on the “Create New Attribute” button to add a new attribute and complete the attributes properties such as Default label, Values required or not, Product preview image etc.
- After completing attribute properties, save it and mark the checkbox to select the attribute and complete the step by clicking on the Next button.
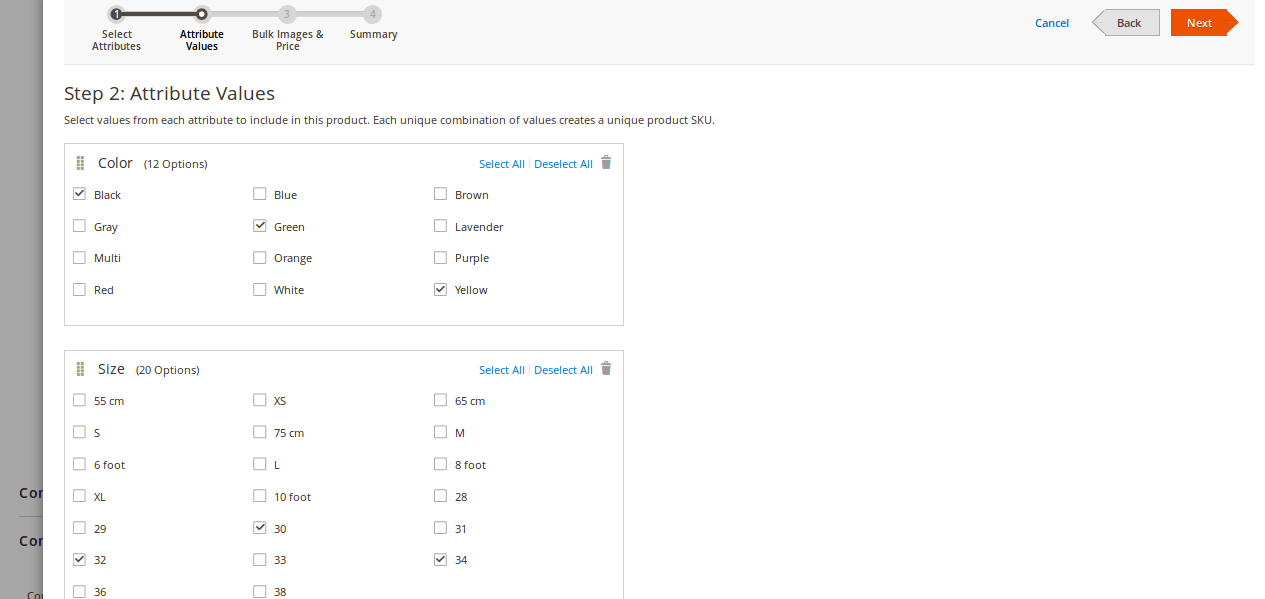
Step 4: Add Attribute Values
- Select each variation of the product you need to add.
- You can also create a new value if it’s not available by clicking “Create New Value”.
- Follow the same process for all the attributes you have chosen to set.
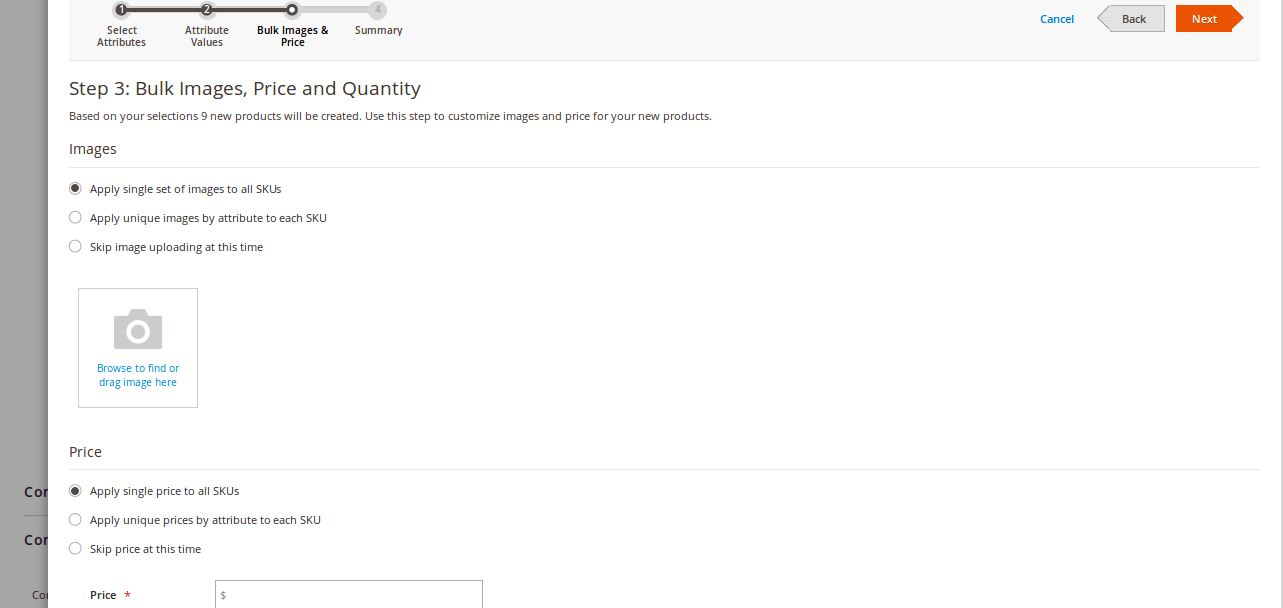
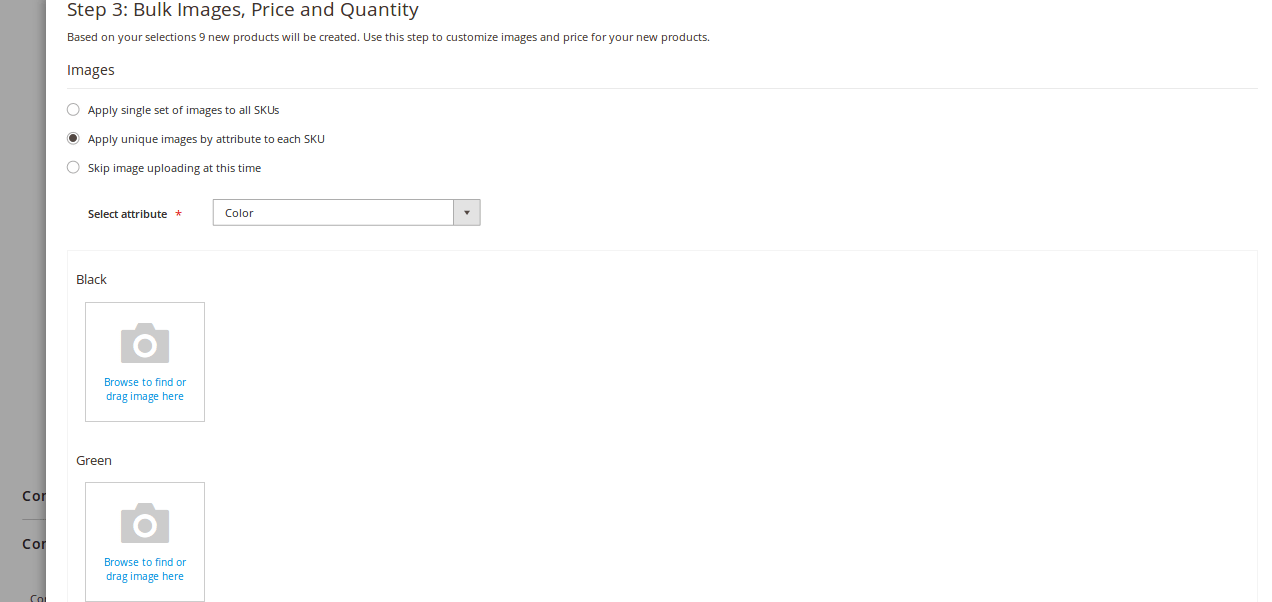
Step 5: Upload the Images and add the Price & Quantity
- Configure the product image where you can select from below options
- Apply a single set of images to all SKUs
- Apply unique images by attribute to each SKU
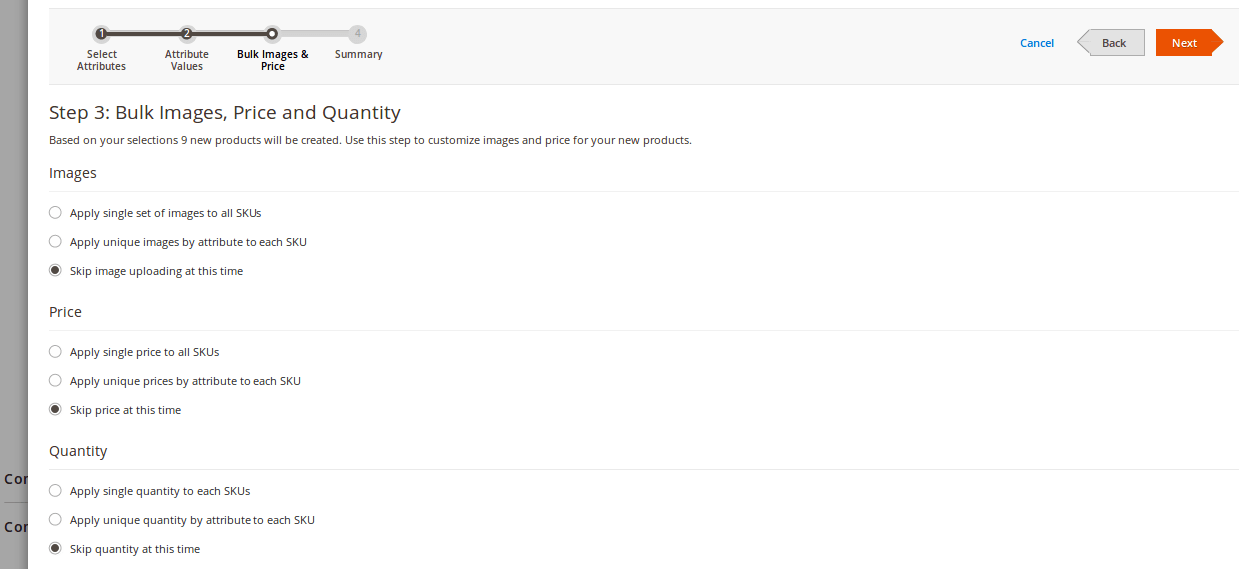
- Skip image uploading process at this time
- After image uploading, configure the price where again you can apply a single price to all SKUs or set unique prices by attribute to each SKU.
- Once done with the price, enter the quantity and click on the Next button to move on the last step.
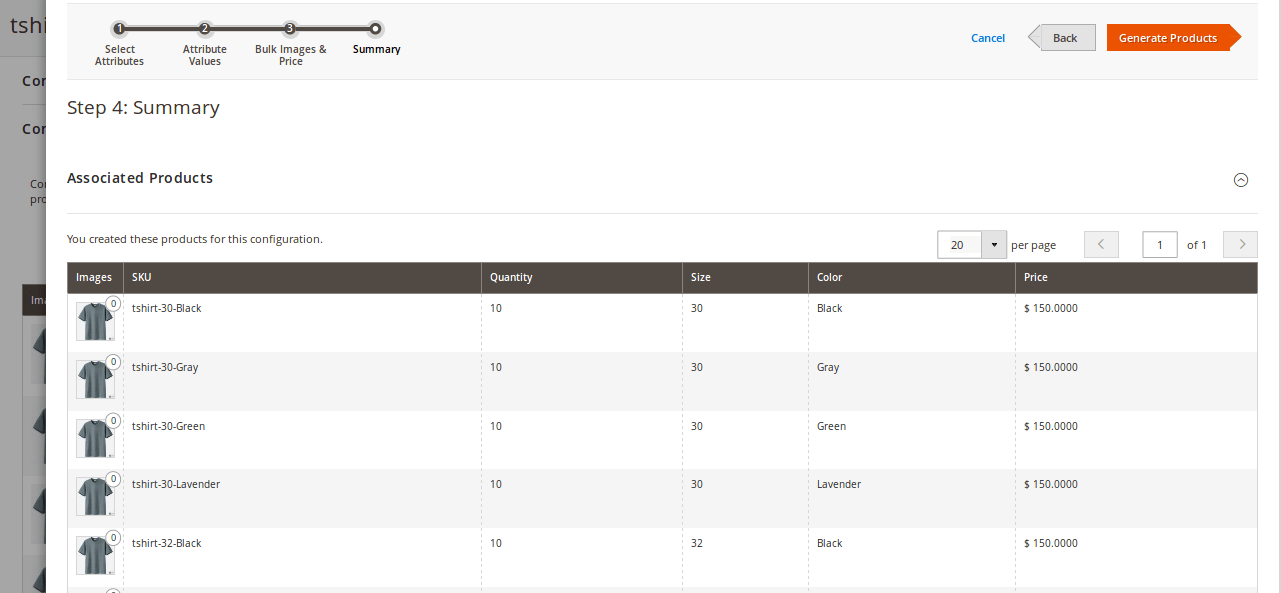
Step 6: Final step is to generate the product configurations
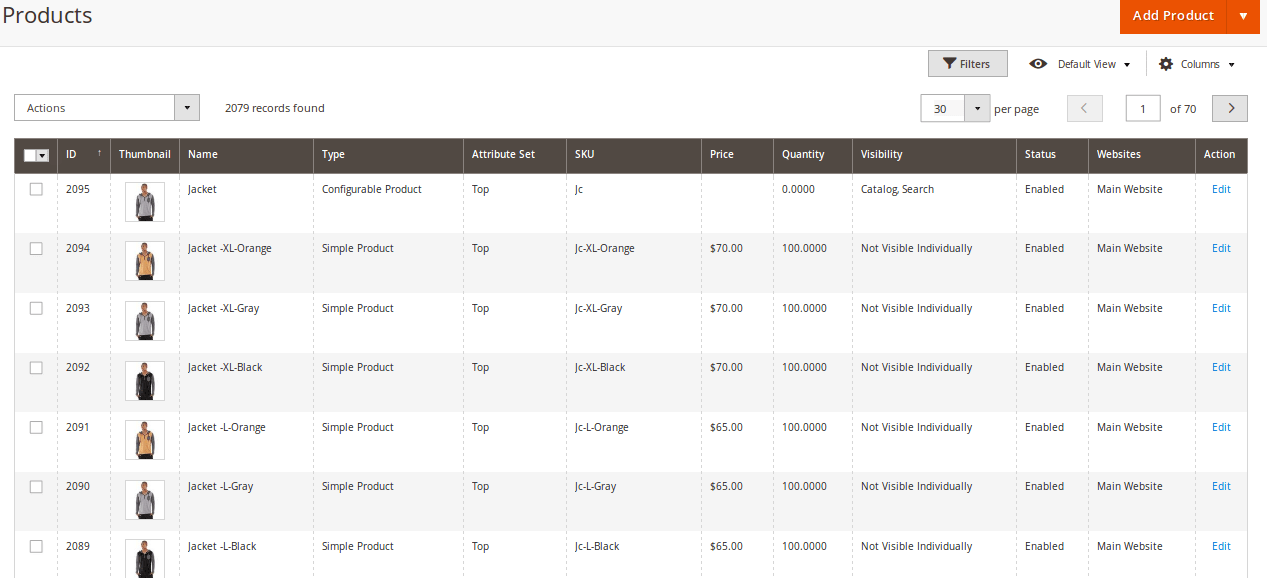
- Check the product list and if everything is correct, click on “Generate Product” to add the product to catalog.
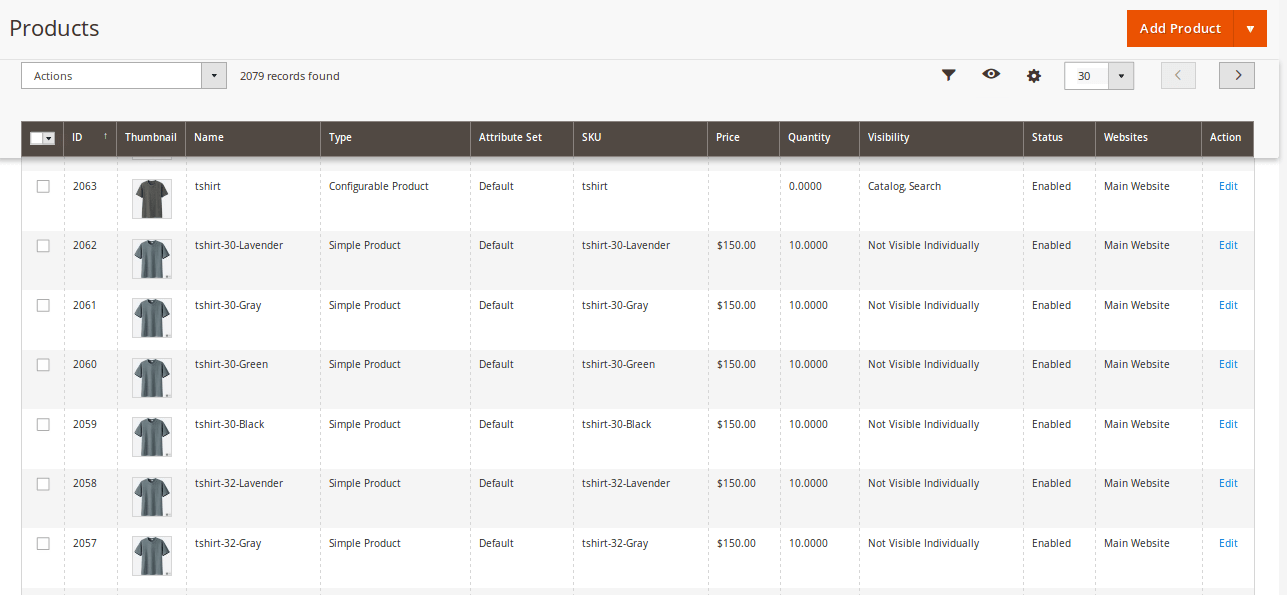
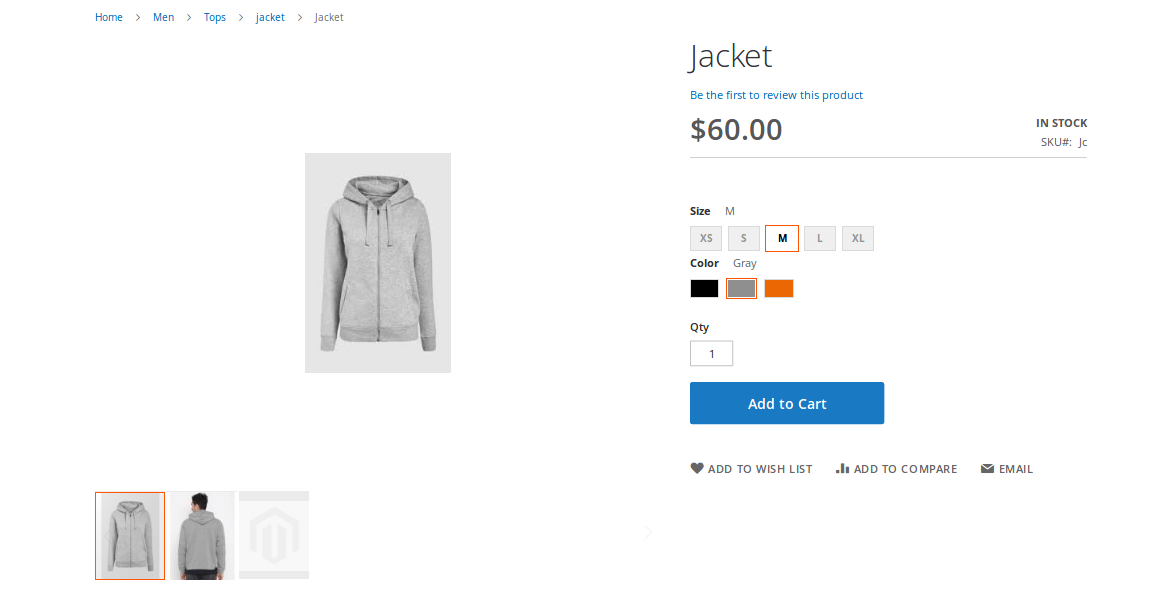
- Check these added products on the product list page and finally check the result on the front end.

Using CSV File:
- Create CSV file to add configurable products and add Product SKU, product name, price, categories, product type, images and URL key. Once CSV file is created, follow the below steps further.
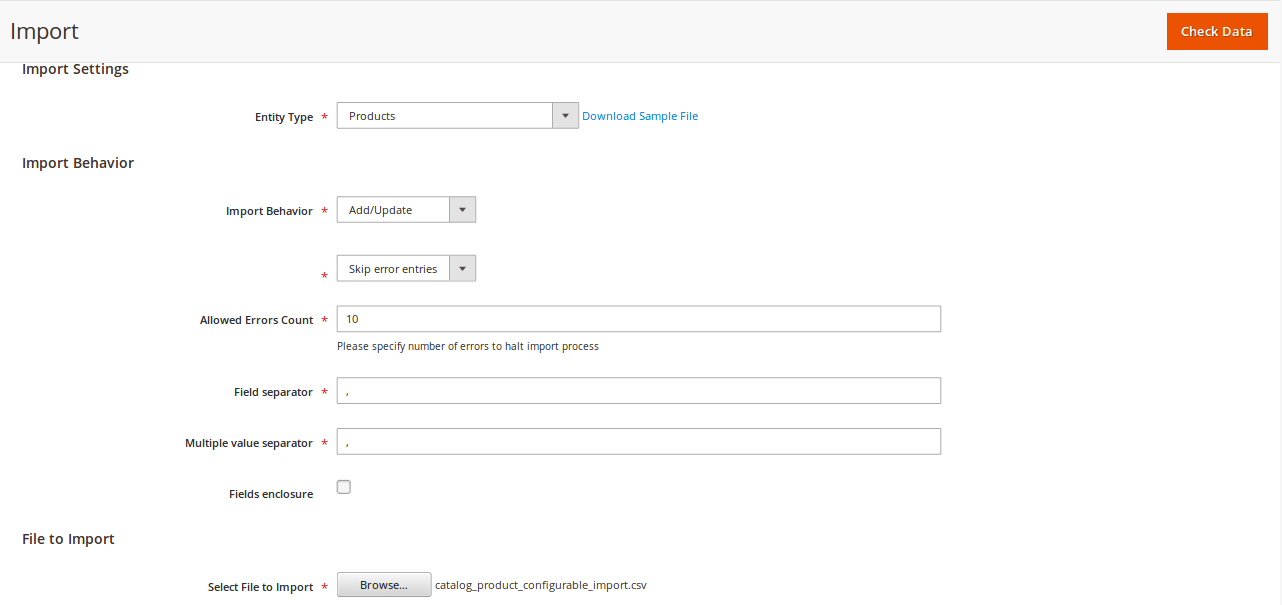
Step 1: Import
- On the backend sidebar, click on “System” under menu and then click on “Import” under “Data Transfer” submenu.

Step 2: Add the required details
- Complete the Import process by selecting
- Entity Type -> Product
- Adding Import Behaviour -> Add/Update
- Select a file to import
- After adding all such details, click on “Check Data” in the upper right corner to continue.
Step 3: Validate Results
- Clicking on the “Check Data” button will display below details to validate the results.
- If there are no such errors then validate the result by clicking “Import” which result in “Import Successfully done” message.


Step 4: Check your product on the front end
- Check the generated products on the product list page.
- View the result on the front end side to check how it looks to your customer when they view your configurable product.
Now you can compare that configurable product type is the best choice for products with multiple options because it may be time-consuming to set up a configurable product, but it will be time-saving in the long term business’s growth.
