 using GTM on Magento 2.webp)
Step-By-Step Guide: Set Up Google Analytics 4 (GA4) using GTM on Magento 2
 using GTM on Magento 2.webp)
Google Analytics is like a powerful microscope for websites and online businesses. It's a free tool from Google that helps website owners and marketers understand how people interact with their websites.
In this post, we'll explore what this extension is and how it can benefit your Magento 2 store.
What is Google Analytics Extension for GA4?
Google Analytics Extension for GA4 is a valuable tool for Magento 2 store owners looking to harness the power of GA4's advanced analytics and tracking capabilities. It bridges the gap between your Magento 2 store and the powerful tracking and analysis capabilities of GA4.
By simplifying the integration process and offering features tailored to e-commerce needs, the extension empowers businesses to make data-driven decisions and optimize their online presence.
Benefits of Google Analytics 4 Magento 2 Extension
When choosing a Magento 2 Google Analytics 4 (GA4) extension, ensure that it is up-to-date, well-maintained, and compatible with your Magento version. And It’s the best option to improve your online store's performance.
Here are some of the benefits of using a Google Analytics 4 extension in Magento 2:
- Advanced Tracking
- Real-time Data
- Integration With Other Google Services
- Event Tracking
- Enhanced E-commerce Tracking
- Custom Reporting And Analysis
Steps to Set up Google Analytics 4 on Magento 2 Using GTM
Step 1 – Create a Google Analytics Account:
Firstly, you need to sign in to your Google Analytics account If you don't have, then click on GA4 Home Page to create an account.
To create GA property click on Start measuring You see open an analytics page. Now You need to specify your Account Name and select the Account Data Sharing Settings.

Then move to the Property setup and add “Your Property Name”. Then add/adjust your time zone and currency.
Now Click the Show Advanced options right before the blue next button and set some additional information

Next, you need to provide business information Like Select your business size, Select boxes that apply to you in the ‘How do you intend on using Google Analytics business.

Lastly, Google will take you to its Terms of Service Agreement. Once you have done all steps, Your account is created.
Step 2 – Create a Google Tag Manager account
Since we add Google Analytics 4 to Magento through Google Tag Manager, you need to sign in to your GTM account If you don't have, then click on GTM page To create an account.
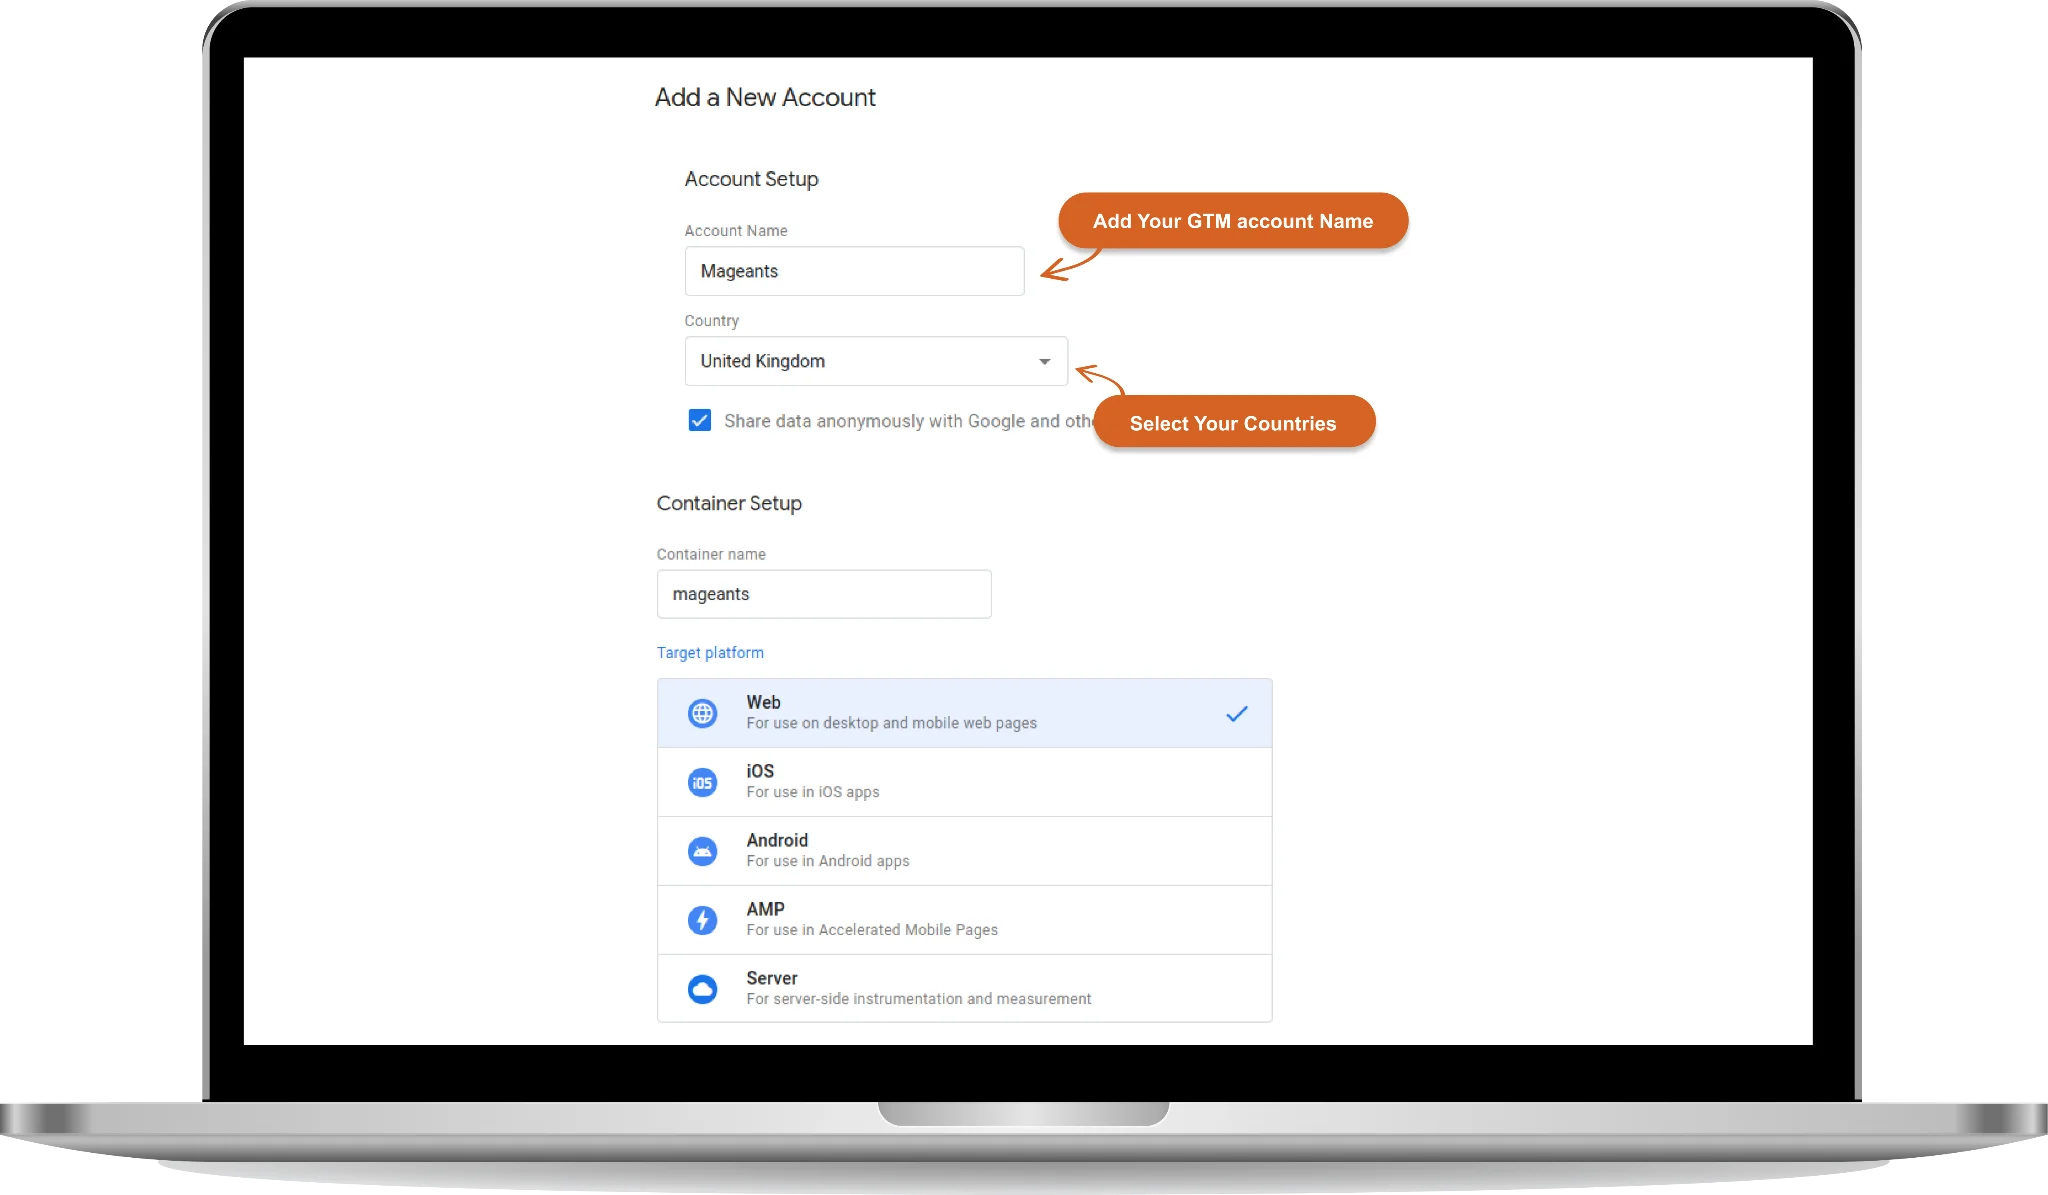
Then Click on the Create Account button, set the Account Name, Country, and Container Name, and choose the target platform.

After done all the above steps, select the data processing terms field and finally click in the top right corner button yes.
Step 3: Get Your required Information From the GA And GTM account
Now You Have to Get your Script code, Public ID, Account ID, and Container ID From your GTM account.
For getting JS and Non JS code, please go to your Google Tag Manager account and move to Account → Container. Now go to Admin → Install Google Tag Manager.
Here you can find JS and Non JS code.

For GTM configuration, you will need an account ID And, container ID from your Google Tag Manager account.
To Get Public ID, Go to the Admin tab to find the public ID near the container name.
To get Account and container ID, Go to the GTM account and move to Account ID → Container ID → Workspace. Now, check the URL and copy both the account ID and container ID.

Get your Measurement ID
You will also need measurement ID from Google Analytics 4 Account. So go to GA4's account and select the respective Property → View. Now, click Admin, and under the column of your property, select Data Streams. Then select your data stream and copy the measurement ID.

Step 4: Install Magento 2 Google Analytics 4 Extension
Download Mageants GA4 Extension and install it. Once installed, go to Stores → Configuration → MageAnts → Google Tag Manager to enable it.

Once you have your account ID, container ID, and measurement ID, configure your GTM API under the Magento 2 extension configuration.

Step 5: Generate and import JSON into GTM
After configured All field properly, set Public ID and press on the Generate JSON Container & Download File button to get the JSON file To Import GTM tag.

The final step is to import the Magento 2 container into GTM. Now It's required to import all the tags, triggers, and variables for the extension to work.
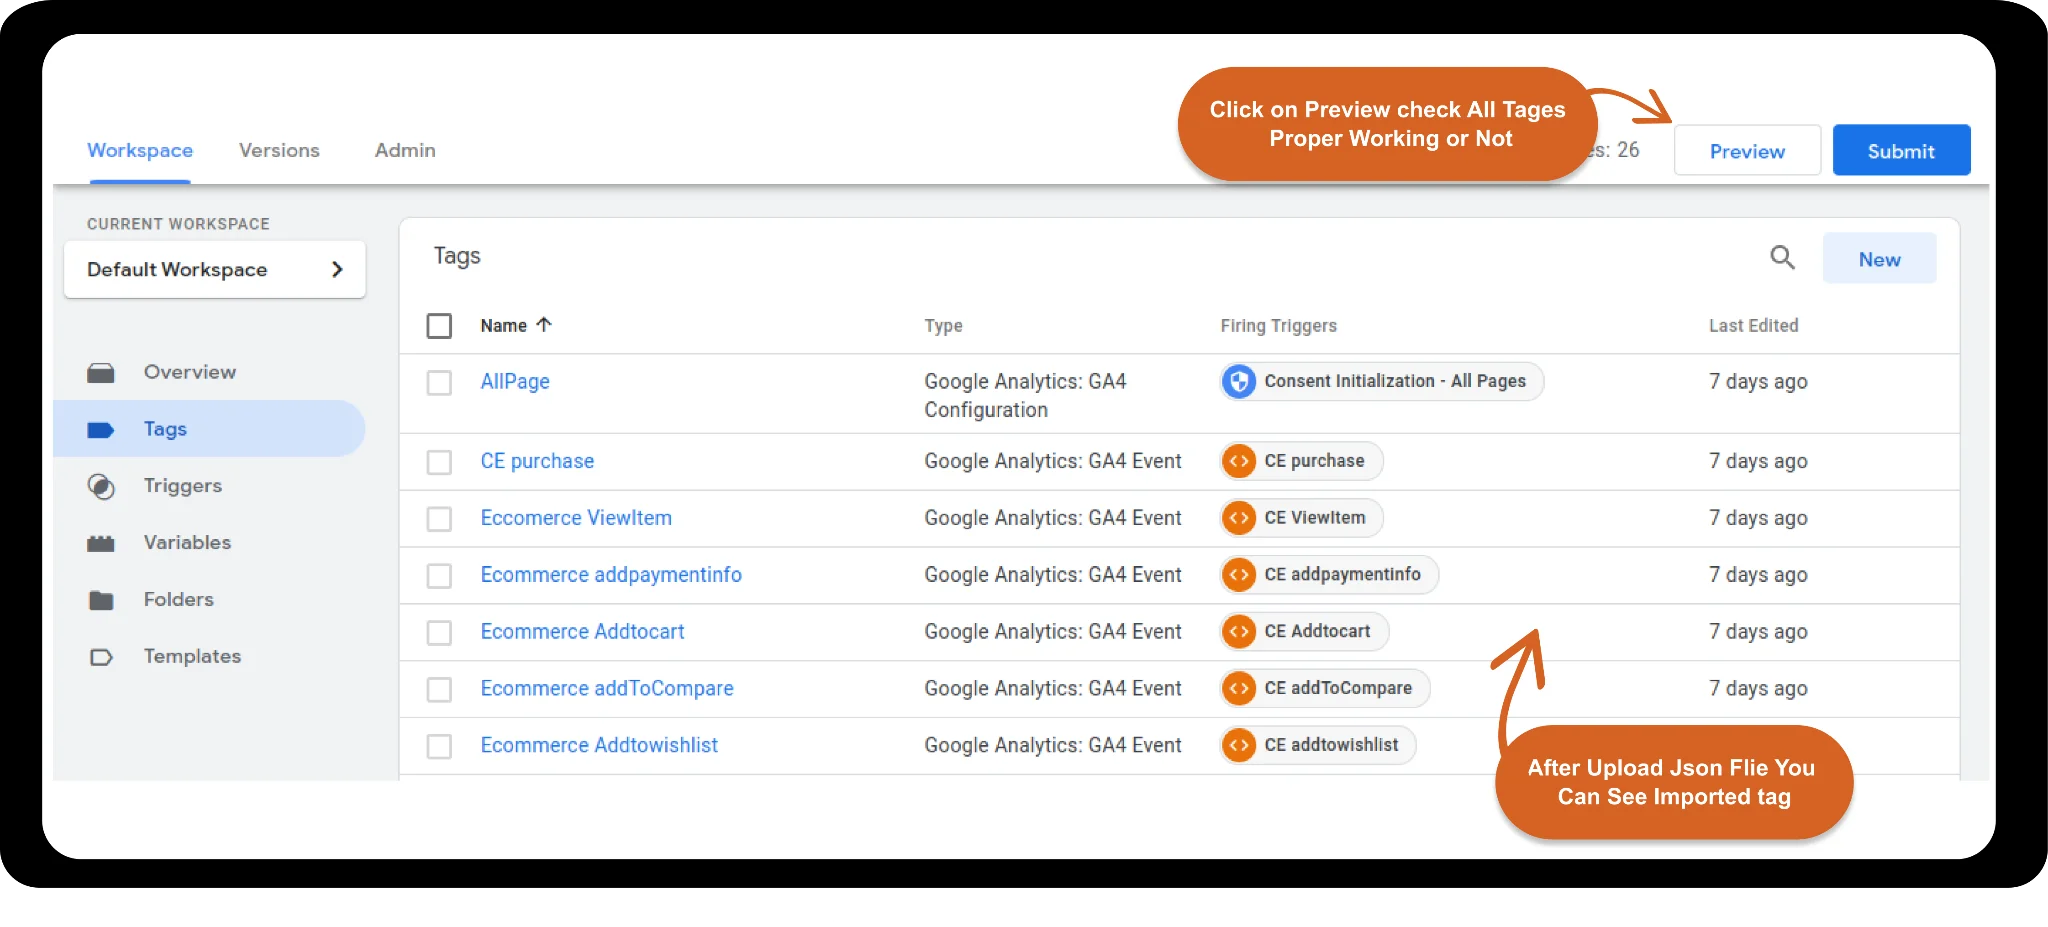
Move to Account → Container. Click on the Admin → Import Container, browse the downloaded JSON file, select the workspace, choose one of the import options, and click “Confirm”.

After Import the tag successfully, You can check your tags from Workspace → Tags. Lastly, click the “Submit” and “Publish” buttons to publish the tags.

Step 6: Data Tracking in Google Analytics
To check whether your data has been tracked from your website, log in to your Google Analytics 4 account, then Go to Account And. From the left sidebar, Go To Reports → Engagement → Events. You can view all your events tracked.

Google Analytics 4 starts collecting data after the setup is complete, and the data will not be updated immediately. It is conservatively estimated that it takes approximately 24–48 hours for the data to be fully displayed in Google Analytics.
But you can see fired event name and Parameters After the event is fired within 30 seconds, go to Report → Realtime.

That's it! You've successfully set up Google Analytics 4 in Magento 2 using this MageAnts extension! And you can now start tracking user data and analysing your website's performance. We hope our this tutorial has been useful to you.
