How To Use JQuery In Magento 2

Magento 2 is used for web development and it’s work according to module-based strategy as it loads the module when it requires. By default, Magento 2 adds required JavaScript library i.e Magento 2 includes jQuery as well. Additionally, there is no need to add base URL separately as by default Magento 2 sets base URL configuration in the RequireJS file. Base URL is one type of prefix of web URL of the module and it adds base URL in the prefix of your module URL. If you check the source code of any webpage then you will get the default base URL configuration.
How to Configure RequireJS File?
To add the Js file to your magento 2 custom module, you need to add the requirejs-config.js file to your module at the path app / code / Mageants / Blog / view / frontend.
|
var config = { map: { '*': { mageantsmodule: 'Mageants_Blog/js/custom', } } }; |
How can you call jquery in magento 2?
Step 1:
Create requirejs-config.js file for our js declaration.
Create requirejs-config.js at app/code/Mageants/Blog/view/frontend/requirejs-config.js.
|
var config = { map: { '*': { mageantsmodule: 'Mageants_Blog/js/custom', } } }; |
Here mageantsmodule is our widget name.
Step 2:
Create custom.js file for file for declaring our widget.
Create custom.js at app/code/Mageants/Blog/view/frontend/web/js/custom.js
|
define(['jquery','jquery/ui'], function($){$.widget('mage.mageantsmodule ', {//Your Code});}); |
In above js file, We have created the custom widget in Magento 2, Here you must need to pass jquery/ui as dependencies for call our custom widget in any phtml file.
Step 3:
Now we need to create a template file with a widget launcher.
Create test.phtml file at app/code/Mageants/Blog/view/frontend/templates/test.phtml
|
<div class="jquery-info"><button id="jquery-info-action" type="button">JQUERY INFO</button> </div> <script type="text/x-magento-init">{"#jquery-info-action":{"Mageants_Blog/js/custom": { } } }</script> |
Step 4:
Let’s add our block to the product page.
Create catalog_product_view.xml at app/code/Mageants/Blog/view/frontend/layout/catalog_product_view.xml.
|
<?xml version="1.0"?> <page layout="1column" xmlns:xsi="http://www.w3.org/2001/XMLSchema-instance" xsi:noNamespaceSchemaLocation="urn:magento:framework:View/Layout/etc/page_configuration.xsd"> <body> <referenceContainer name="product.info.main"> <block class="Magento\Catalog\Block\Product\View" name="mageants.jquery.info" template="Mageants_Blog::test.phtml" after="product.info" /> </referenceContainer> </body> </page> |
How to Override Default Magento js file?
There is two way to override default Magento js file:
1) Override js file
2) Create Mixin
1. Override js file:
Step 1:
Create requirejs-config.js file at app/code/Mageants/Blog/view/frontend/requirejs-config.js.
|
var config = { "map": { "*": { "Magento_Catalog/js/catalog-add-to-cart": "Mageants_Blog/js/catalog-add-to-cart" } }}; |
Step 2:
Now Create your catalog-add-to-cart.js file at app/code/Mageants/Blog/view/frontend/web/js/catalog-add-to-cart.js.
2. Create Mixin:
For add new methods using mixin you do following steps.
Step 1:
Create requirejs-config.js file at app/code/Mageants/Blog/view/frontend/requirejs-config.js.
|
var config = { config: { mixins: { 'Magento_Catalog/js/catalog-add-to-cart': { 'Mageants_Blog/js/catalog-add-to-cart-mixins': true } } } }; |
Step 2:
Create catalog-add-to-cart-mixins.js file at app/code/Mageants/Blog/view/frontend/web/js/catalog-add-to-cart-mixins.js
|
define(['jquery','mage/translate','underscore','Magento_Catalog/js/product/view/product-ids-resolver','Magento_Catalog/js/product/view/product-info-resolver','jquery-ui-modules/widget'], function ($, $t, _, idsResolver, productInfoResolver) {'use strict';return function (widget) {$.widget('mage.catalogAddToCart',widget, {options: {processStart: null,processStop: null,bindSubmit: true,minicartSelector: '[data-block="minicart"]',messagesSelector: '[data-placeholder="messages"]',productStatusSelector: '.stock.available',addToCartButtonSelector: '.action.tocart',addToCartButtonDisabledClass: 'disabled',addToCartButtonTextWhileAdding: '',addToCartButtonTextAdded: '',addToCartButtonTextDefault: '',productInfoResolver: productInfoResolver},/*** @param {String} form*/enableAddToCartButton: function (form) {var addToCartButtonTextAdded = this.options.addToCartButtonTextAdded || $t('Added Successfully'),self = this,addToCartButton = $(form).find(this.options.addToCartButtonSelector); addToCartButton.find('span').text(addToCartButtonTextAdded);addToCartButton.attr('title', addToCartButtonTextAdded); setTimeout(function () {var addToCartButtonTextDefault = self.options.addToCartButtonTextDefault || $t('Add All to Cart'); addToCartButton.removeClass(self.options.addToCartButtonDisabledClass);addToCartButton.find('span').text(addToCartButtonTextDefault);addToCartButton.attr('title', addToCartButtonTextDefault);}, 1000);}}); return $.mage.catalogAddToCart;}}); |
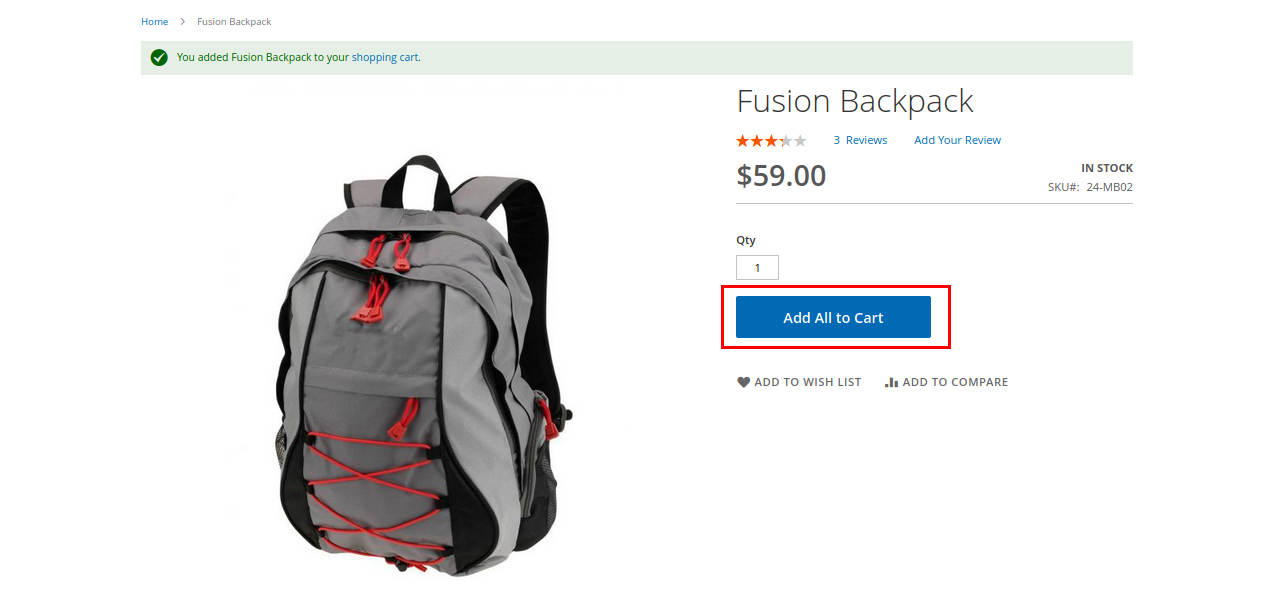
With the above in place, When you click on Add to Cart then change the button text to Add All to Cart.

Conclusion:
JavaScript is a very useful technology for eCommerce developers. Hope, this article helped you with how to use jQuery in Magento 2, Mageants have mentioned the most recommended way and the best practice to use the jQuery library in Magento 2. Let us know if you are still facing any problems or issues by commenting or sharing your feedback with us.
