
How to Import Products in Magento 2?

Yes! Look no further because this piece is for you. So, to achieve this, it is essential to find a tool that gives the ability to manage multiple records in a single action. With the help of Magento 2, the most natural solution to update changes in your product catalogue is upload them with the help of CSV (Comma Separated Values) file using Magento 2 Import Products functionality.
Let’s begin!
Table of Contents :
-
A Detailed Roadmap for How to Import in Magento 2 by using CSV
To import a variety of products, product types and product attribute accurately, you should follow the below steps:
-
Step 1: Prepare the Data
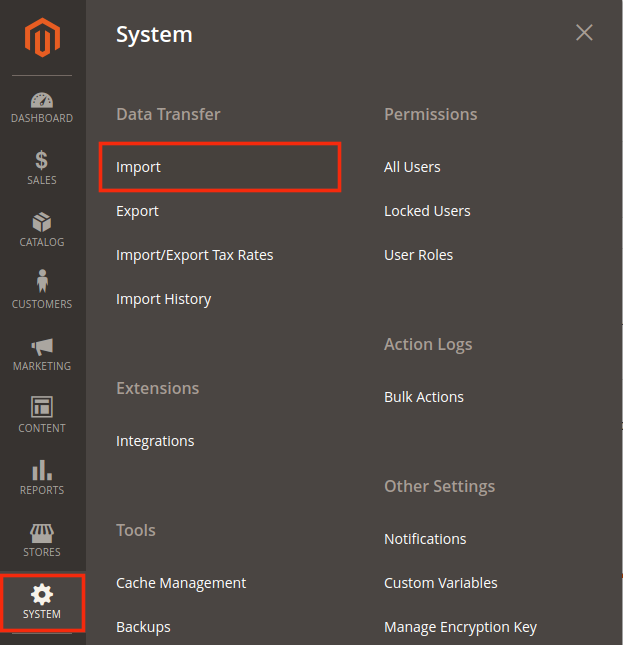
Login to the admin dashboard and go to System > Data Transfer > Import as shown below.
In an Import Setting sections, from the drop-down menu, select Entity Type as “Products”.
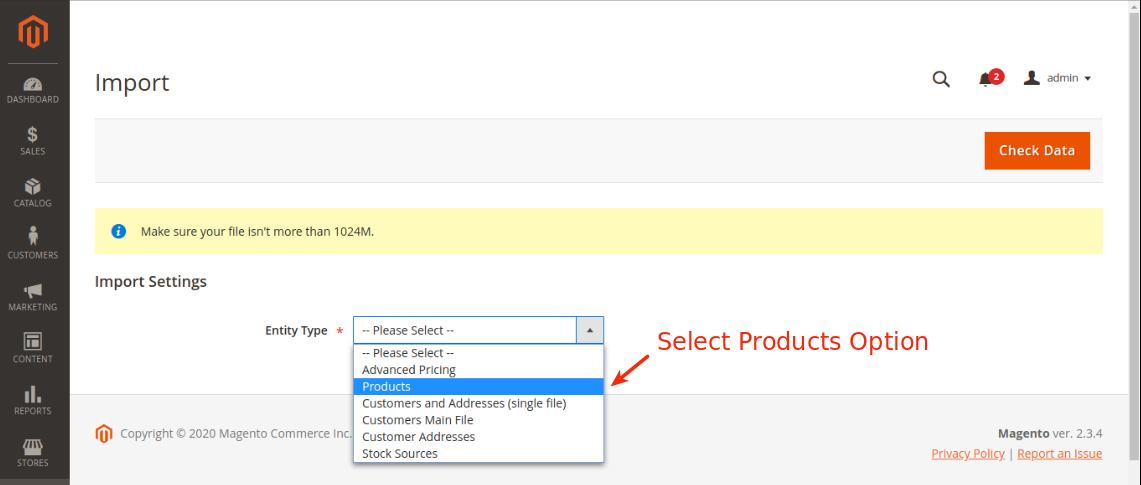
After choosing the Entity Type to Products, you can check the “Download Sample File” link appear next to the Entity type field. To check the file, you can download the sample file for your reference and compare the same with your file. Make sure that your CSV import file follows the same format of the sample file.

-
Step 2: Configure Import Behaviour
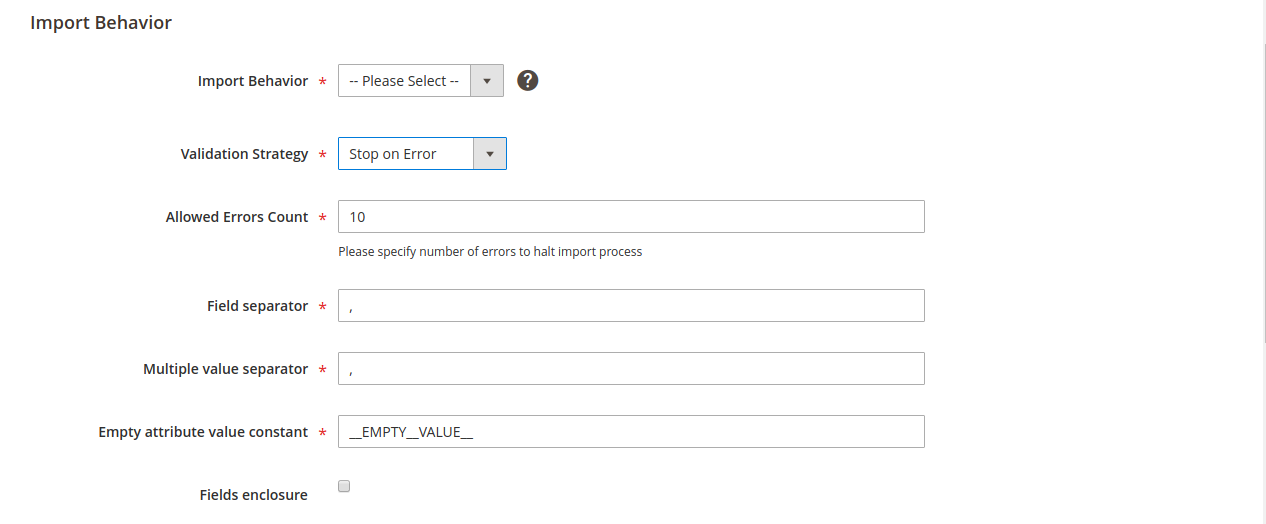
In the Configure Import Behaviour Section, there are multiple fields that you need to choose while importing data in the Import Behaviour section.
- For Import Behaviour, set: Add/Update, Replace Existing Complex Data or Delete Entities.
- For Validation Strategy, set: Stop on Error and Skip Error Entities.
- For Allowed Errors, Count, set error count number.
- For Field Separator, you need to accept the default value comma.
- For Multiple Value Separator, you need to take the default value comma as the default separator in CSV file is a comma.
Refer below screenshot for the same.
-
Step 3: Specify the Import File
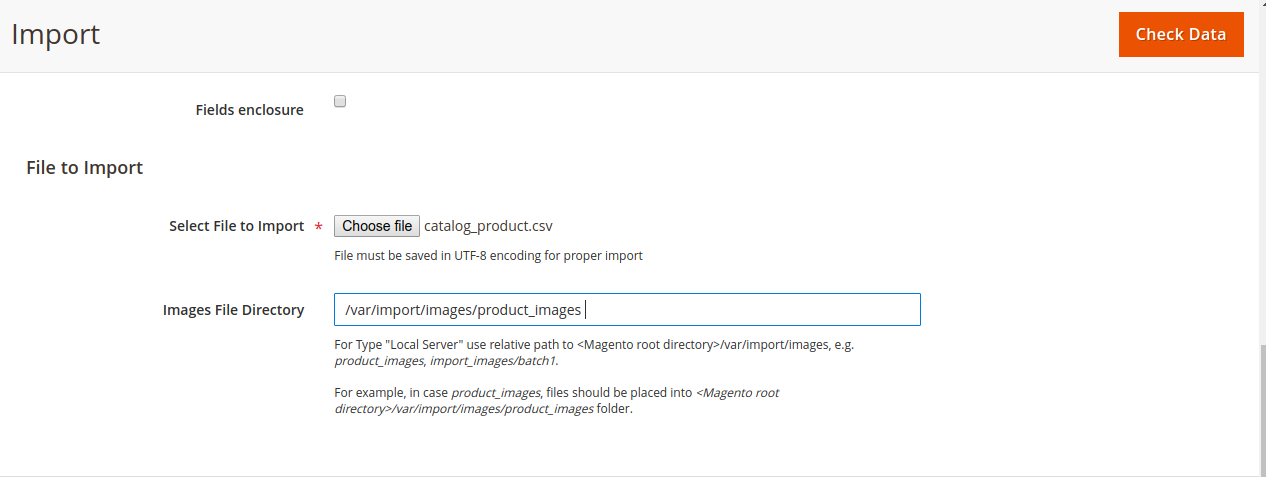
- In the File to Import section, click on thechoose filebutton and select your import data file and the click Open.
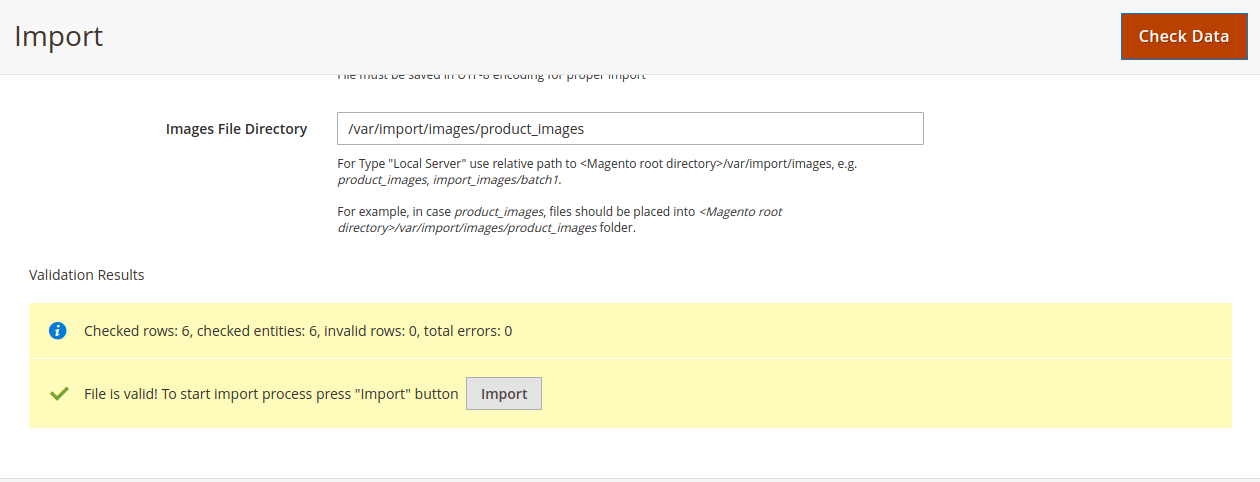
- After this, in the Image File Directory field, enter the relative path to the location on the Magento server where uploaded images are stored as shown in the screenshot.

-
Step 4: Check the Data and Finish the Importing
-
In the upper right corner, click onCheck Dataandwait for the process to complete. With the help of this, you can check data is valid or not.
-
If the CSV file is valid, click the Import button to check validation results.
-
When the importing products complete a message will display to you.

-
In the upper right corner, click onCheck Dataandwait for the process to complete. With the help of this, you can check data is valid or not.
-
Step 5: Check the Import History
-
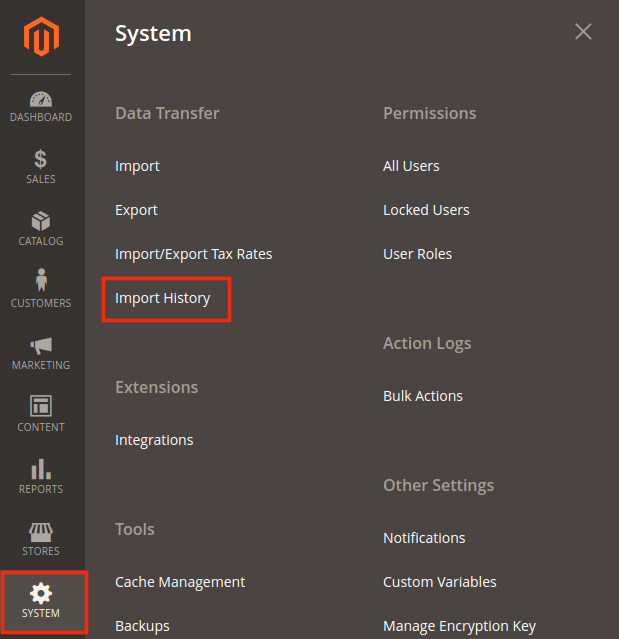
On the Admin Sidebar, select System > Data Transfer > Import History
-
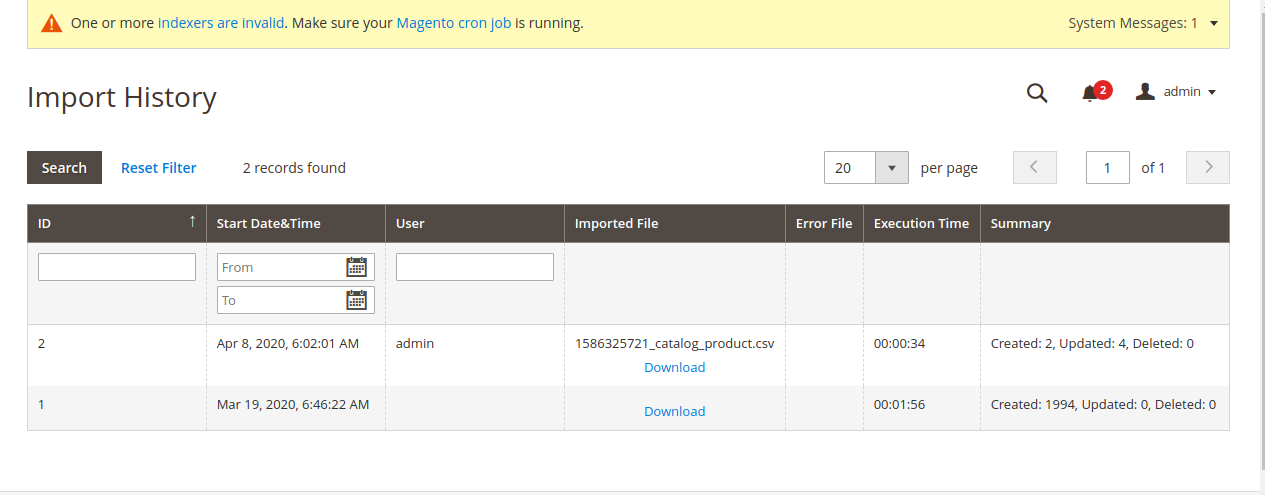
After clicking on Import History, Import History table will show all the action of import for your track.
-
On the Admin Sidebar, select System > Data Transfer > Import History
-
Conclusion :
By following this detailed guide, you can now import products in Magento 2. If you have any questions or doubt, please leave them down below. MageAnts would love to answer.
