
Boosting Efficiency: Streamline Your Order Management with Magento 2 Order Archive

Managing your online store's order history is essential for keeping your Magento 2 e-commerce business organized and efficient. One of the handy features that Magento 2 offers is the ability to archive orders. To enhance the order archiving functionality in your ecommerce store, you can consider Order Archive extension for Magento 2 by MageAnts.
In this step-by-step guide, we'll walk you through the process of enabling and using the archive orders feature in Magento 2.
What Does it Mean to Archive an Order?
Archiving orders allows you to store historical order data separately, keeping your active order list clutter-free while retaining access to essential information.
How to Archive Orders in Magento 2?
Archive order Magento 2 is not a built-in feature, as Magento generally does not provide a direct archive or delete option for orders. Instead, you can mark orders as "closed" or "cancelled" to effectively archive them. Here's a step-by-step guide on how to do this:
Step-1: Backend Configuration
Install the Extension and log in to Magento admin panel and navigate to Stores → Configuration → MageAnts → MageAnts_OrderArchive
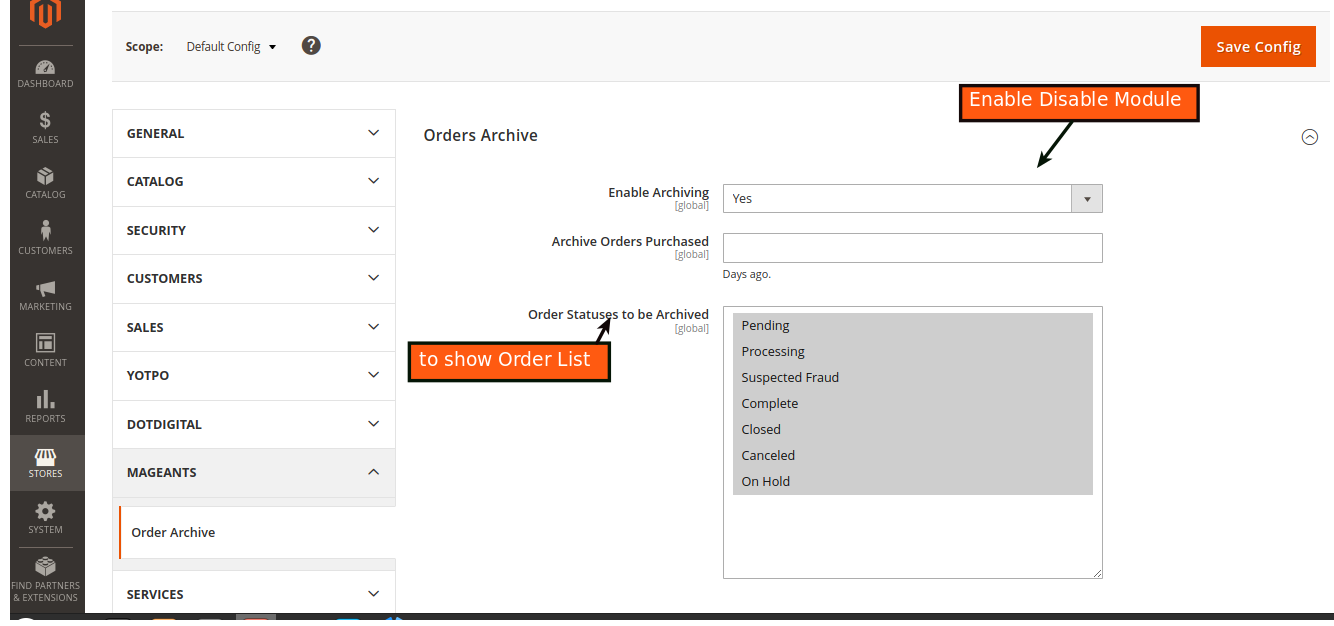
Step-2: Backend Example
Click on Sales to Display Order Record.
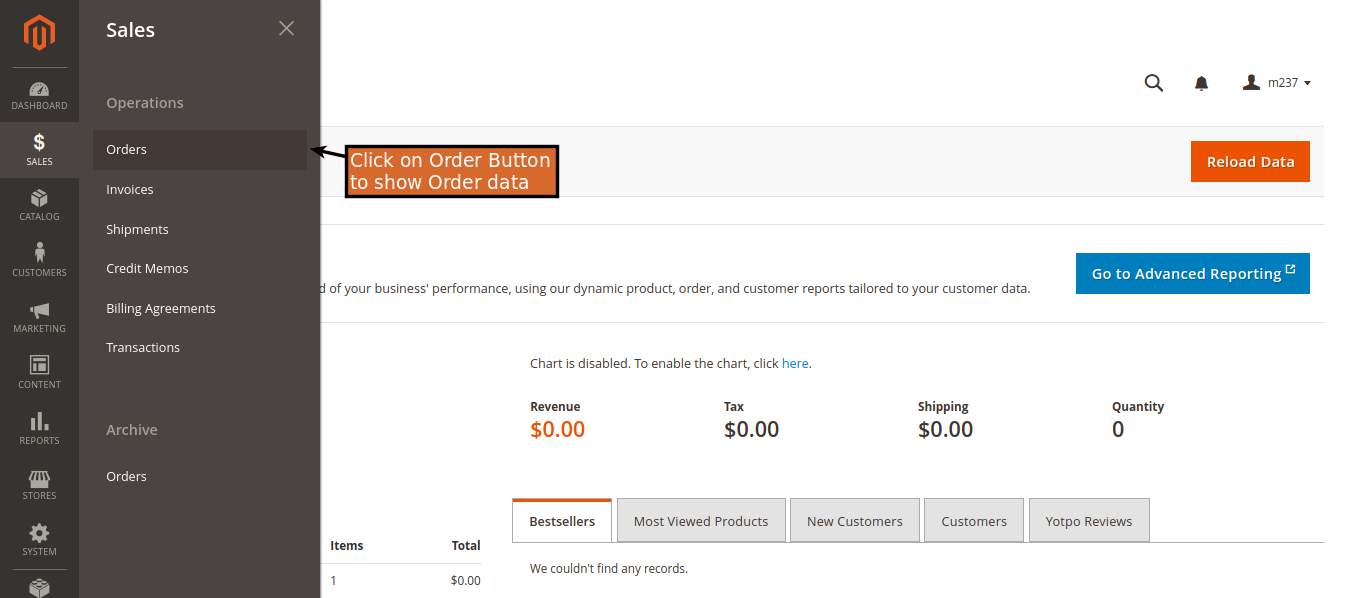
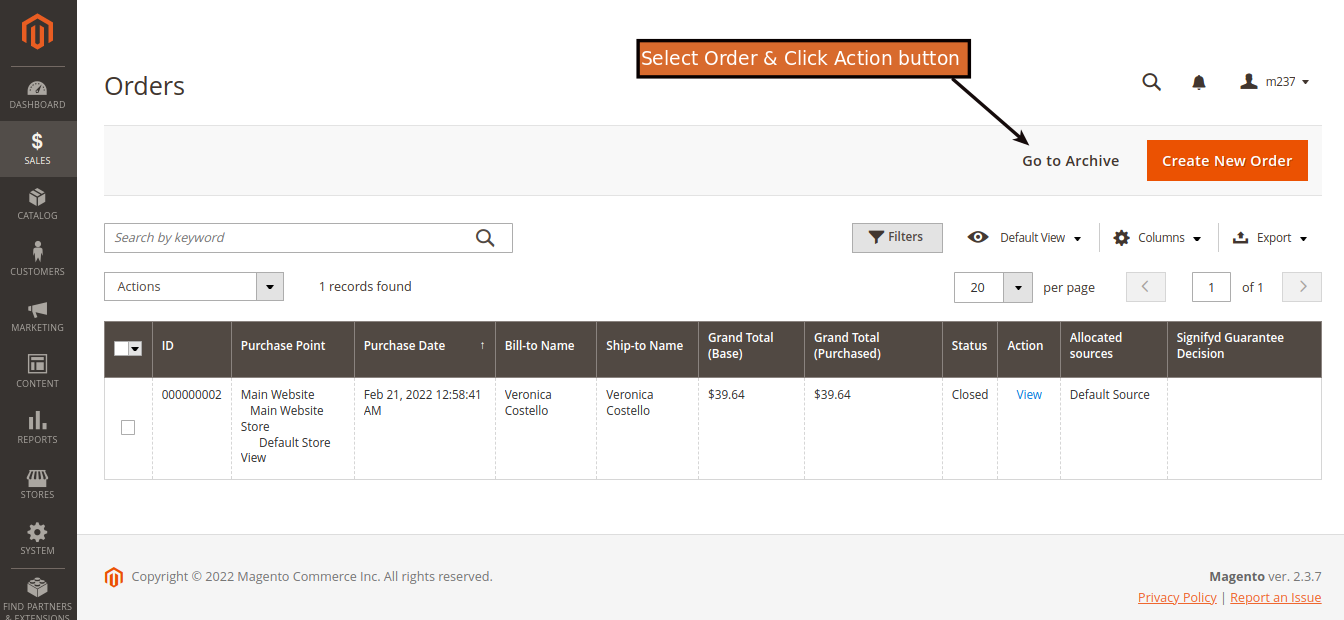
MageAnts/ OrderArchive : Here you can select your order and go to archive data to show archive orders. - you can also Single Data Archive in this page. - you can also order archive with Go to archive data & Select Order And Go to Action field and click on Move to Archive data.
On Archive button to order, go to archive data record.
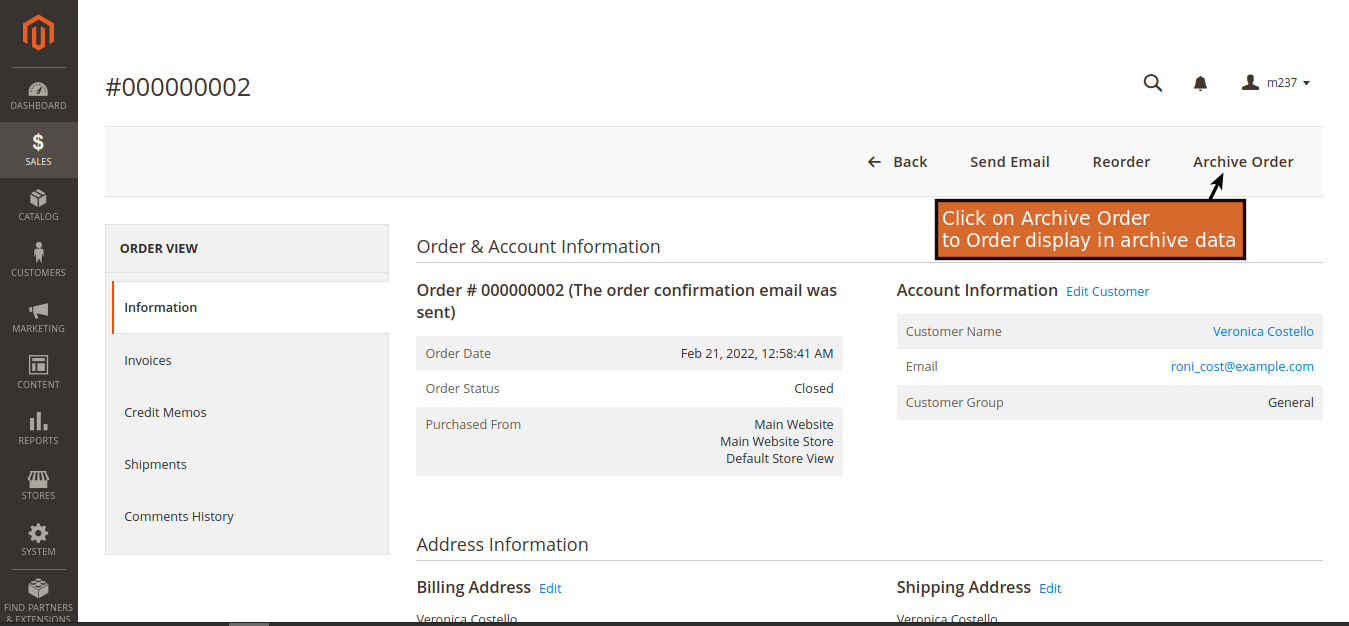
You can also Move to Action button & click on move to order grid in this page.

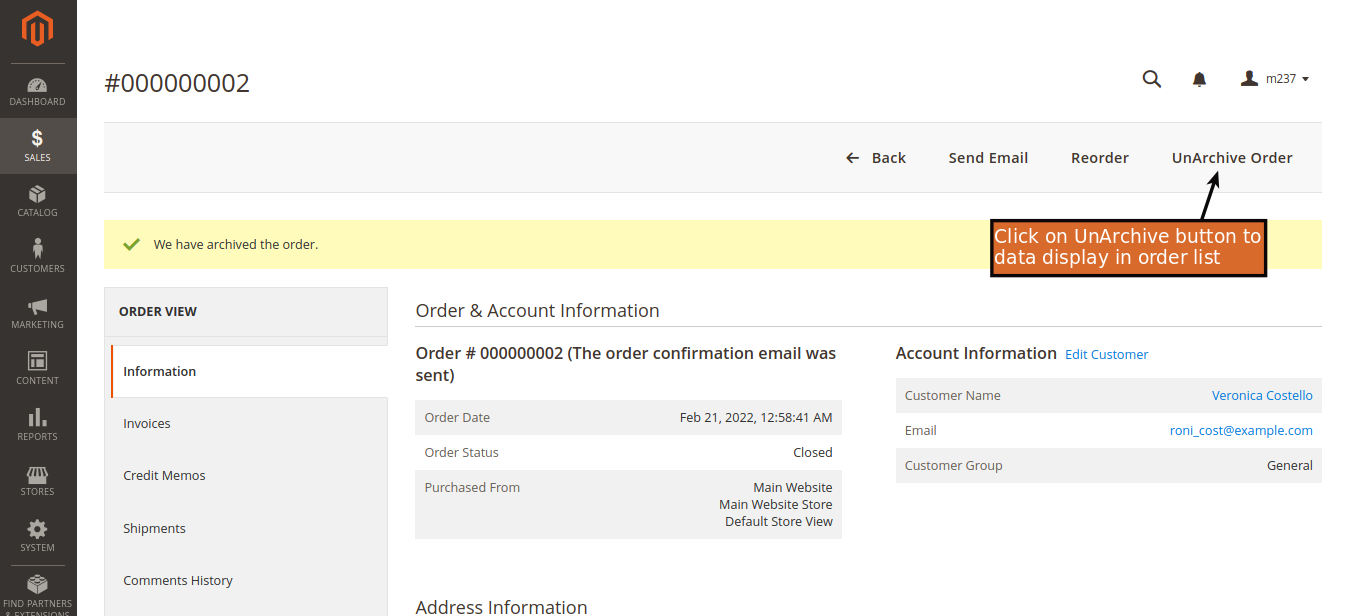
You can also Single Data Archive & Unarchive in this page.
Conclusion:
We hope now you are clear about “how to archive orders in Magento 2”. Magento 2 order archives can be accomplished by marking them as "Closed" or "Canceled" within the admin panel. While Magento does not offer a built-in archive feature, these actions effectively remove orders from the default order grid, helping you keep your order management system organized. Please check our user guide for more details, or contact us.
