
How to Install MageAnts Magento 2 Extensions step by step guide
-
There are too many benefits of Magento 2 Extensions to your store as it helps to decrease your manual work and also helps you in increasing sales, boosting business, simply other hectic things, and many more. MageAnts provides various types of extensions for Magento 2 stores to expand the functionalities and features of your online Magento 2 Store.
There are 2 different methods to Install Magento 2 Extensions from MageAnts:
- Method 1: Install Using COMMAND LINE
- Method 2: Install Extension Manually.
-
Method 1: Install Magento 2 extension using COMMAND LINE (Recommended).
Follow the below steps to install the extension from the command line.
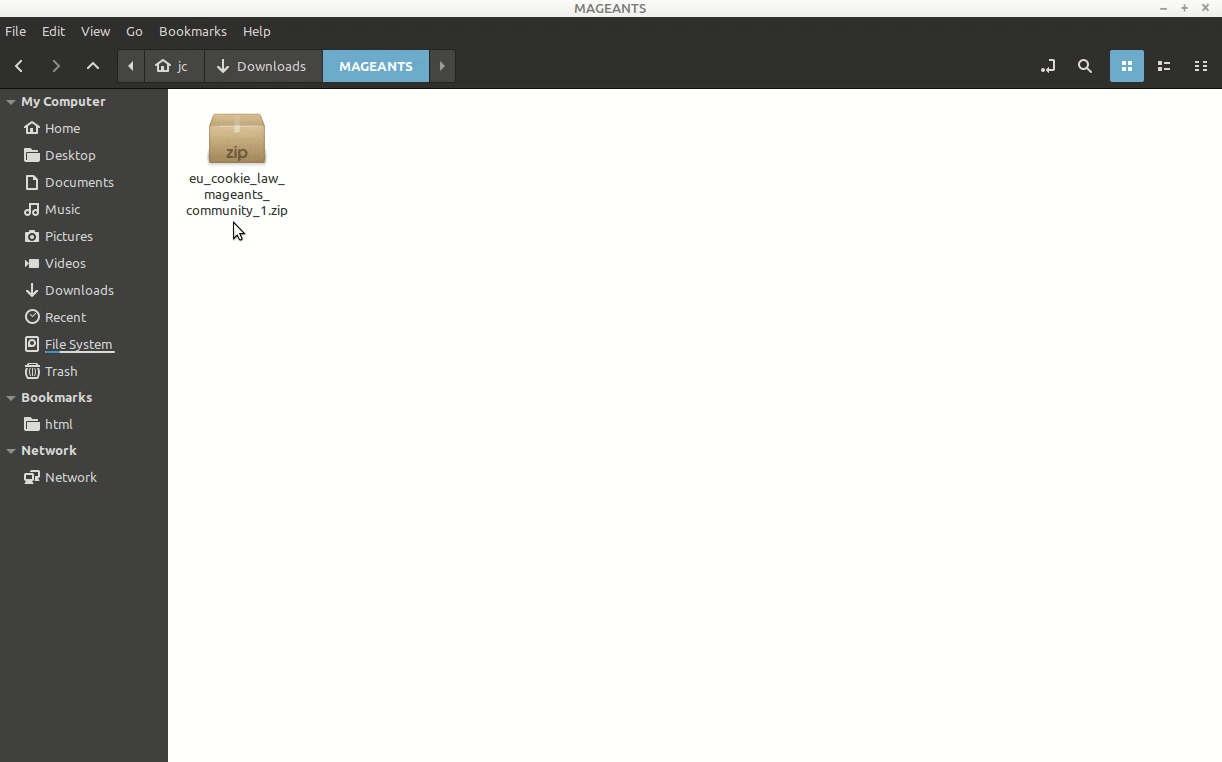
Step 1: First and foremost, you need to download the required extension from the MageAnts website and unzip the extension package.
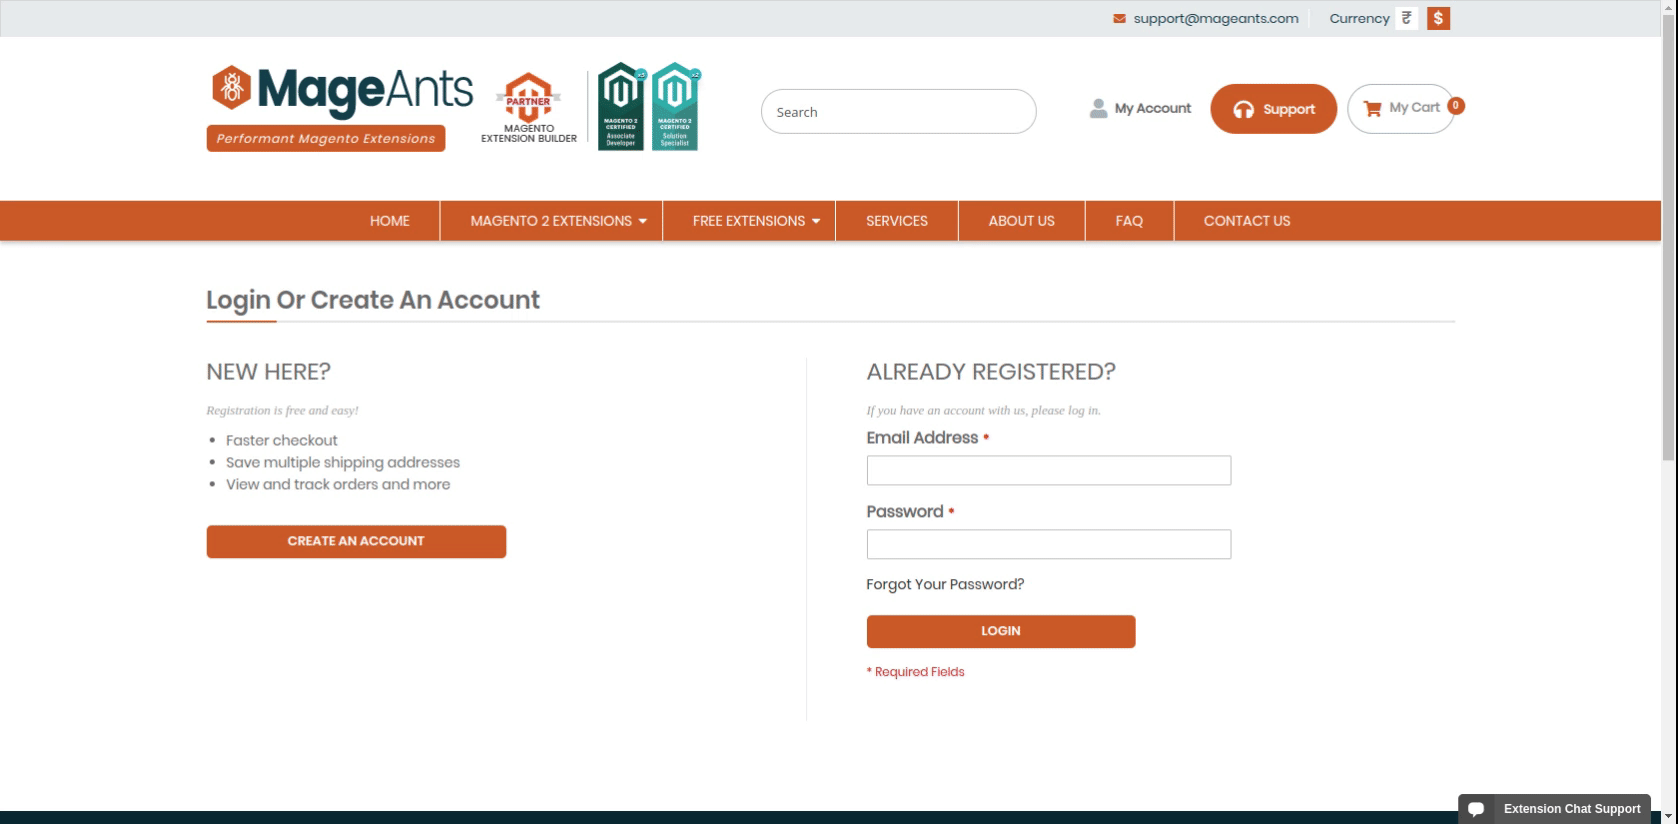
- Login into your account.
- Jump into My Account section
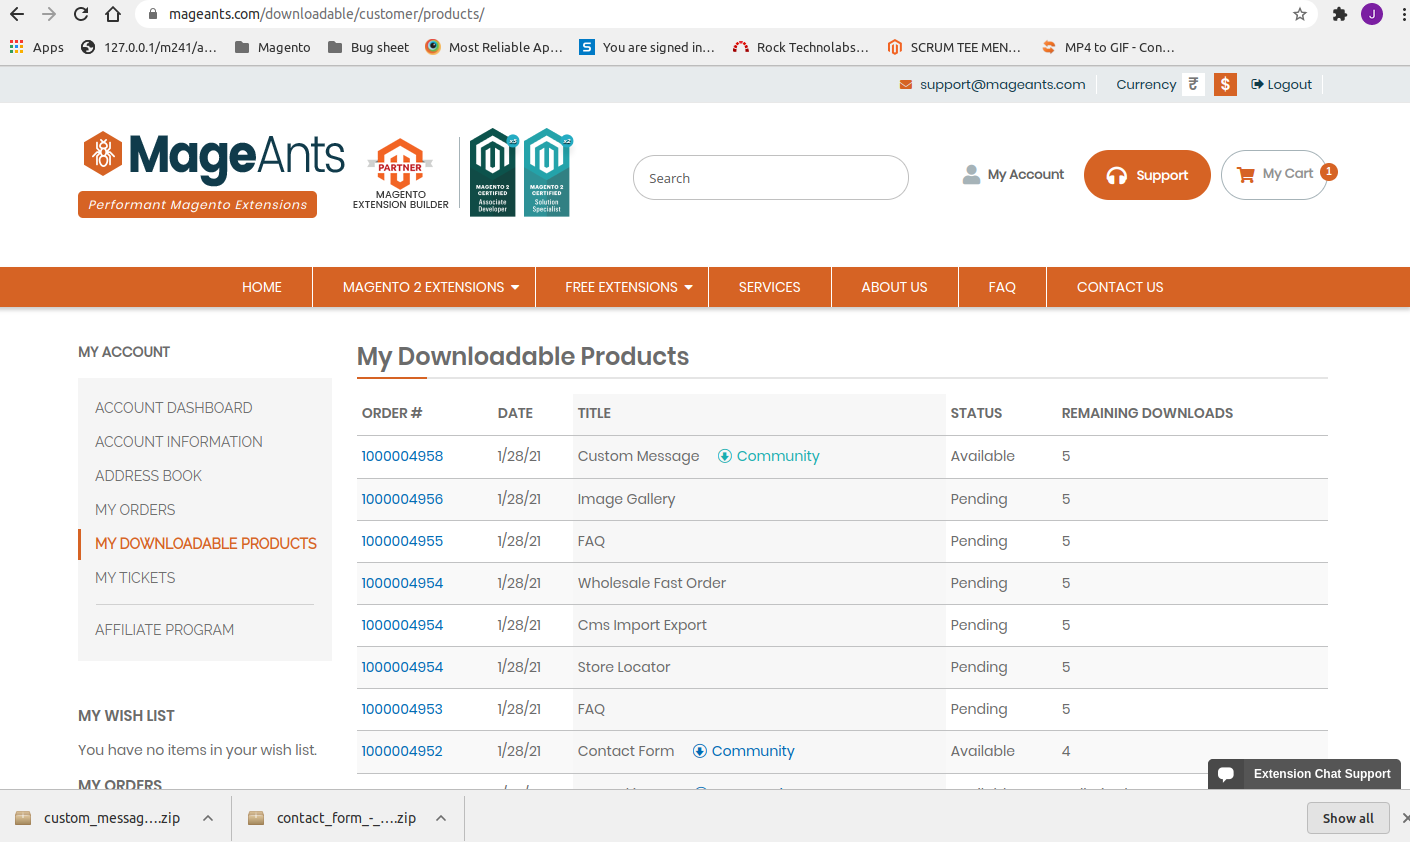
- Download extension from Downloadable section from my account.
- My account>> My downloadable products
- Unzip the extension package
Refer to the below image for more clarification.
Let’s move to step 2 for further process.
Step 2: Upload the unzipped folder to Code Directory.
- Check the unzipped folder and upload the same to the code directory in your Magento installation’s app directory.
- If the code directory does not exist then you can easily create it.
- Let us share that generally with a fresh new set up, the code directory does not exist or might be missing. So you can copy it from the code folder and paste it with the app folder.
- Once you upload the code to the code directory, move further to step 3.
Path: Magento 2.4.1>>app>>code>>MageAnts
-
Step 3: Disable the cache under System → Cache Management.
-
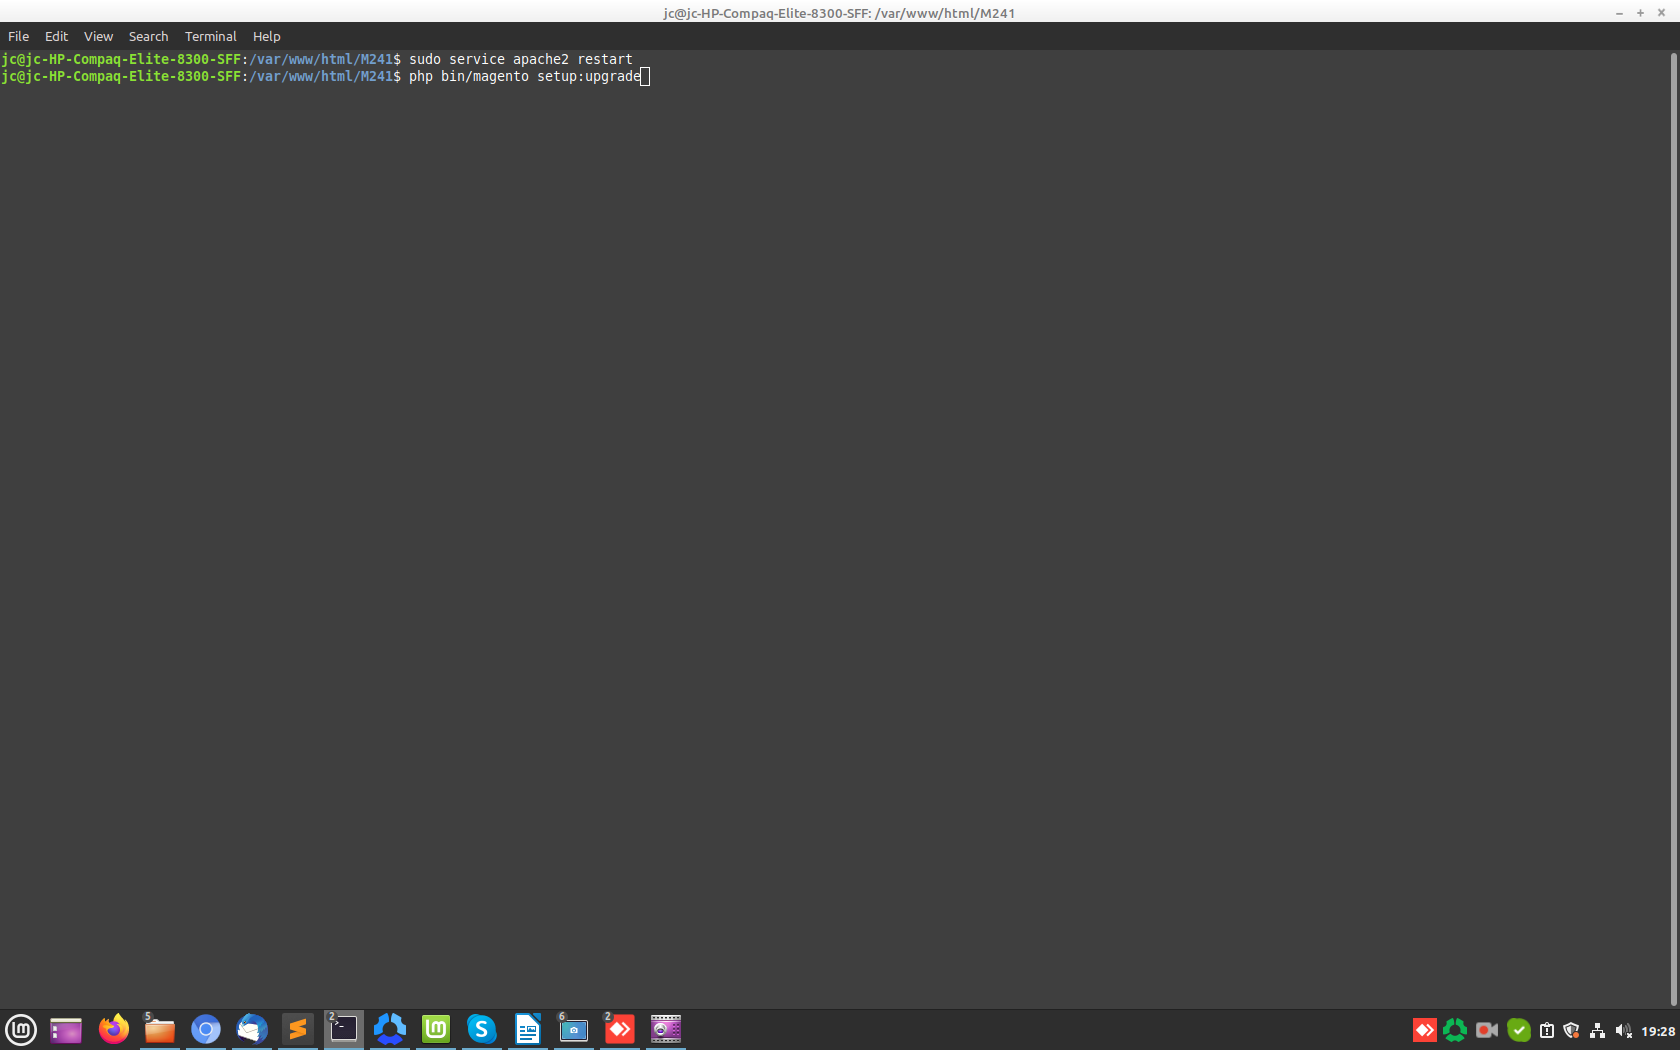
Step 4: Once folders have been uploaded to the code directory run the below-given commands.
- Open terminal on Magento directory and enter the following at the command line.
php bin/magento setup:upgrade
php bin/magento setup:di:compile
php bin/magento setup:static-content:deploy -f
-
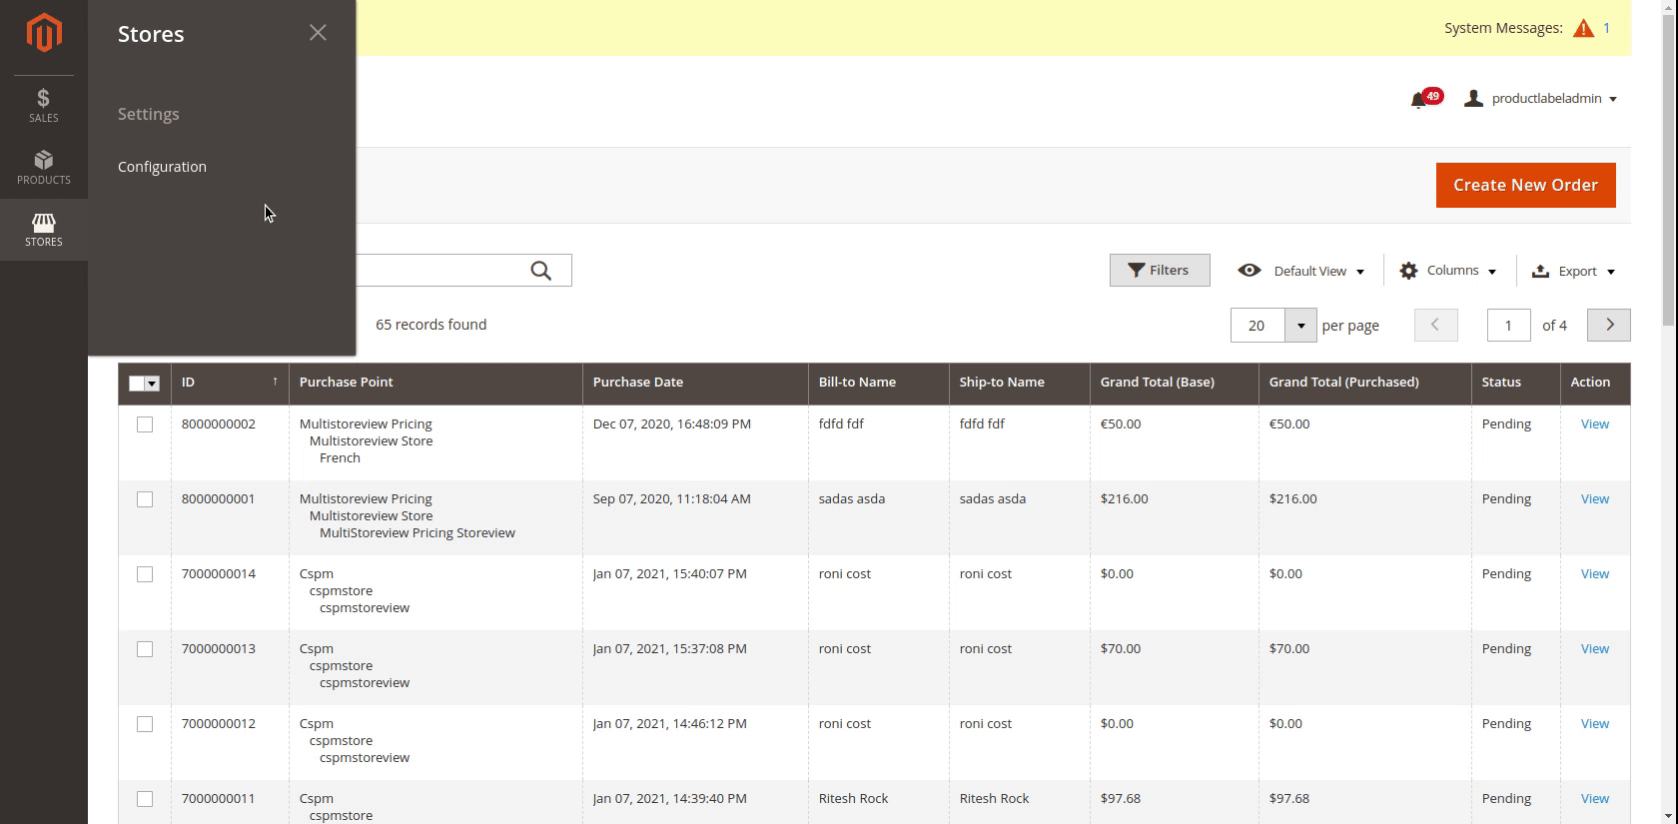
Step 5: Configuration
- Once you complete the above steps log out and log in back to the admin panel.
- Now, it’s time to set up it in the backend panel.
- Switch to Stores → Configuration → MageAnts → Product label. The module will be displayed in the admin panel
That’s it, you are done. An extension is successfully installed in the Magento 2.
===========================================================================================
-
Method 2: Install Magento 2 Extension manually.
Step 1: Download the extension and unzip it.
Also read:- MageAnts Top Selling Magento 2 Extensions For Your Ecommerce Store
-
Step 2: Upload the unzipped folder to Code Directory.
- Check the unzipped folder and upload the same to the code directory in your Magento installation’s app directory.
- If the code directory does not exist then you can easily create it.
- Let us share that generally with a fresh new set up, the code directory does not exist or might be missing. So you can copy it from the code folder and paste it with the app folder.
- Once you upload the code to the code directory, move further to step 3.
Path: Magento 2.4.1>>app>>code>>MageAnts
-
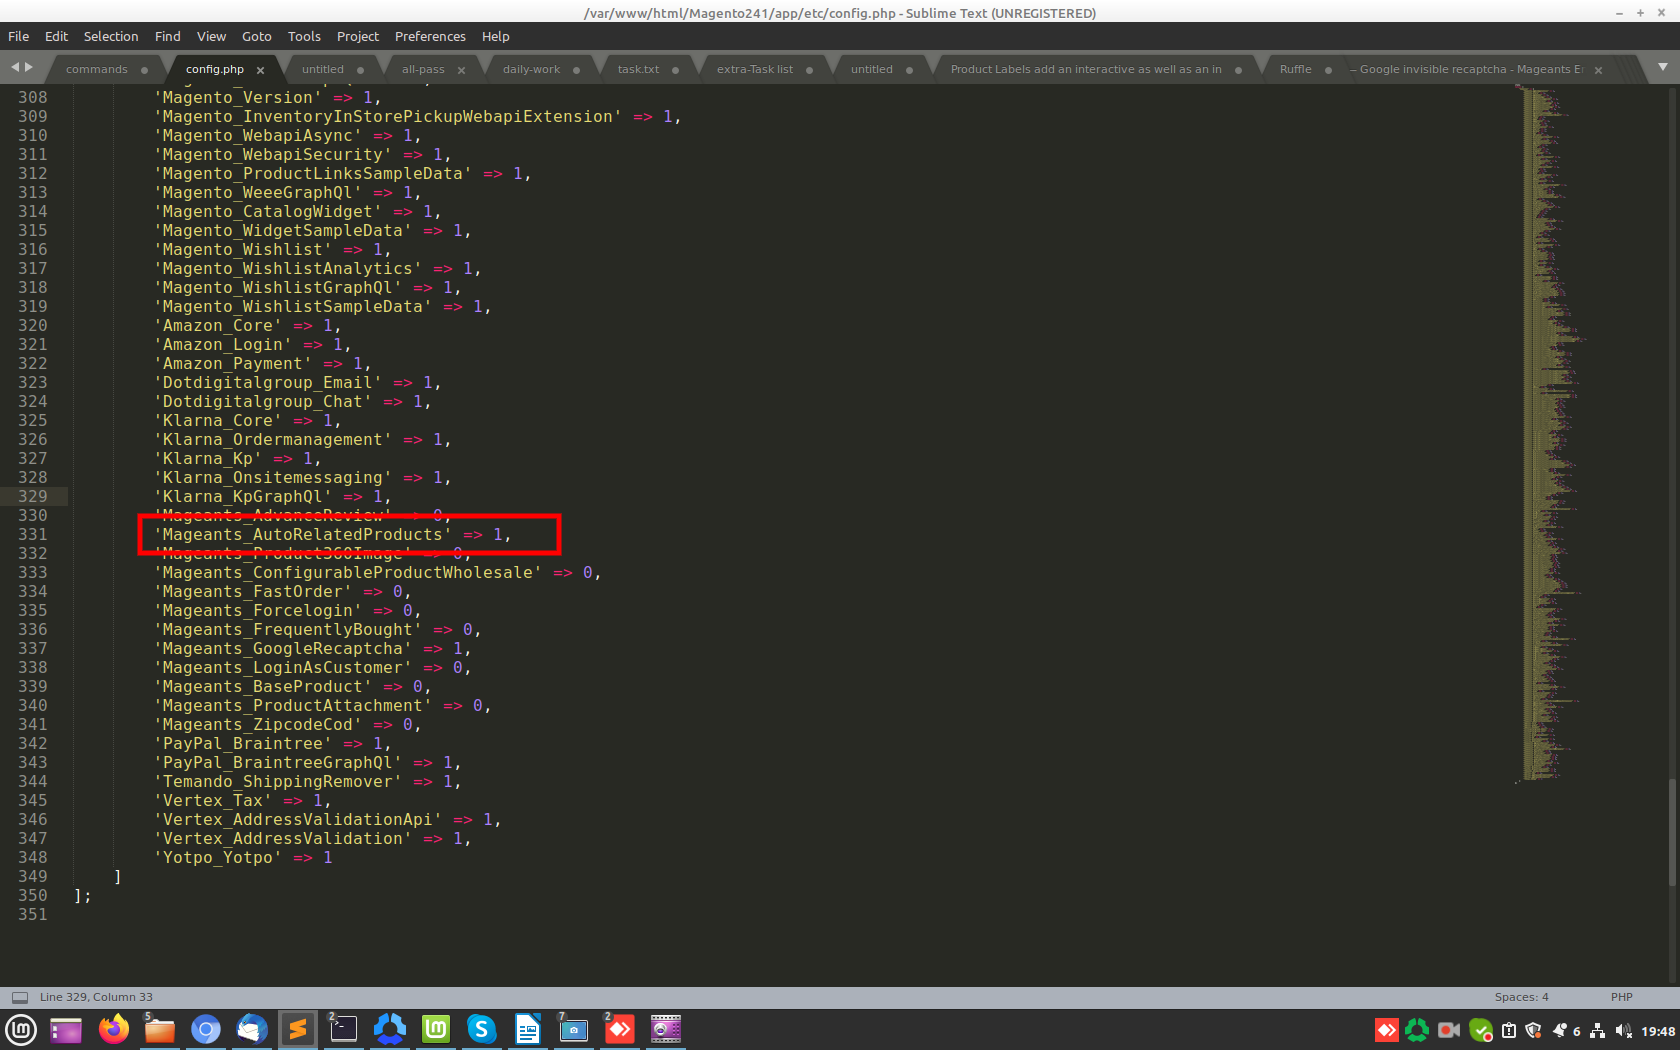
Step 3 edit file with given folder path:
- Once it is uploaded to code directory, edit file with given folder path: app >>etc >>config.php file
- Add one line code: 'Mageants_AutoRelatedProducts' => 1, (extension name with value 1 means enable mode. )
-
Step 4: Once folders have been uploaded to the code directory run the below-given commands.
- Open terminal on Magento directory and enter the following at the command line.
php bin/magento setup:upgrade
php bin/magento setup:di:compile
php bin/magento setup:static-content:deploy -f
-
Step 5: Disable the cache under System → Cache Management
-
Step 6: Configuration
- Once you complete the above steps log out and log in back to the admin panel.
- Now, it’s time to set up it in the backend panel.
- Switch to Stores → Configuration → MageAnts → Product label. The module will be displayed in the admin panel
Now the extension will be added successfully to the Magento 2. Now as the extension has been enabled from the admin side you can view the related details on the front end.
For any other questions, queries or issues please contact MageAnts or you can even mail us: support@mageants.com
